
Are you ready to transform your indoor space with personalized, vibrant décor? DIY spray painted planters offer a creative and affordable way to showcase your favorite plants while adding a unique touch to your home. By carefully selecting the right containers, gathering essential materials, and mastering spray painting techniques, you can craft stunning planters that complement any interior style. This comprehensive guide will walk you through each step, from preparing your planters for a flawless finish to applying protective coatings that ensure durability and shine. Discover how to seamlessly integrate your handmade creations into various rooms, enhancing both the beauty of your greenery and the ambiance of your living environment. Embrace your creativity and make a positive change in your home with stylish, custom-designed indoor plant holders.
Selecting the Perfect Planters for Your Indoor Space
Choosing the right planters is crucial for both the health of your indoor plants and the aesthetic of your home. Different materials like terracotta, ceramic, and metal each offer unique benefits. For instance, terracotta is breathable and great for succulents, while ceramic adds a touch of elegance to living areas. Metal planters provide a modern edge and are perfect for minimalist décors.
When it comes to size and shape, consider the specific needs of your plants and the available space. Larger plants require spacious containers to thrive, whereas smaller plants can flourish in compact pots. Additionally, the shape of the planter can complement your interior design:
- Round planters create a soft, balanced look suitable for cozy corners.
- Rectangular planters offer a sleek, contemporary feel, ideal for tight spaces.
- Hanging planters save floor space and add vertical interest to any room.
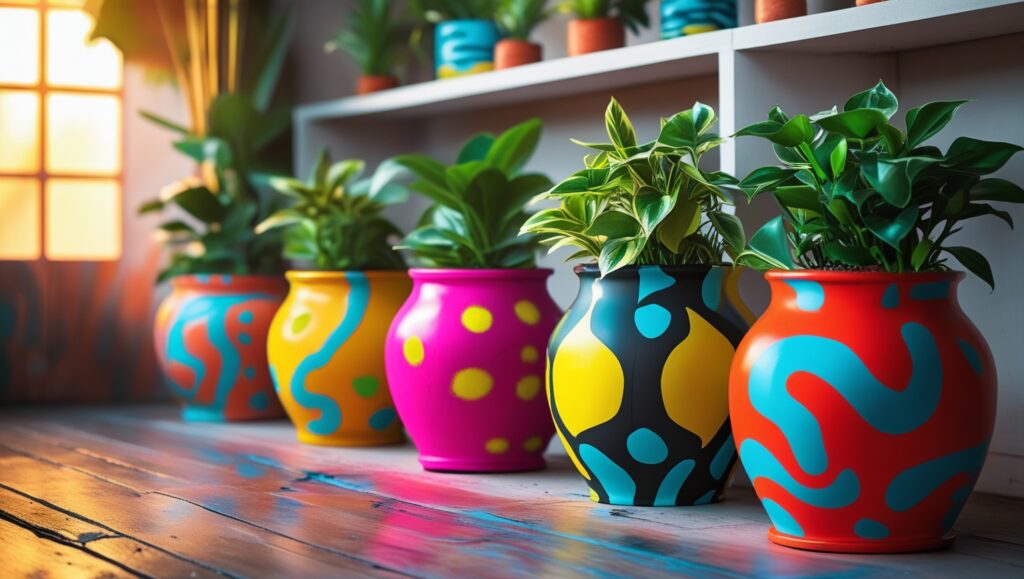
To seamlessly integrate your planters with your interior décor, consider colors and textures that match or contrast your existing furnishings. Spray painting your planters allows you to customize them to fit your style, whether you prefer vibrant hues or neutral tones. Remember, the perfect planter not only supports your plants but also enhances the overall ambiance of your indoor space.
Gathering Essential Materials and Tools
Embarking on your DIY spray painted planters project requires a well-prepared kit of materials and tools. Start with high-quality spray paint to ensure a smooth and vibrant finish. Applying a primer beforehand is essential for better paint adhesion and longevity. Equip yourself with painter’s tape to achieve crisp lines and protect areas you want to keep paint-free. Donning protective gear, such as masks and gloves, is non-negotiable for safety during the painting process.
Understanding the purpose of each tool can streamline your workflow. Refer to the table below for a quick overview:
|
Tool
|
Purpose
|
|---|---|
|
Spray Paint
|
Provides a uniform color and finish to planters
|
|
Primer
|
Ensures paint adheres properly and enhances durability
|
|
Painter’s Tape
|
Creates sharp lines and protects specific areas from paint
|
|
Protective Gear
|
Safeguards against inhaling fumes and prevents skin contact
|
For those mindful of the environment or looking to save some cash, there are eco-friendly and budget-friendly alternatives. Opt for low-VOC spray paints to reduce harmful emissions without compromising quality. Additionally, repurposing old containers not only cuts costs but also adds a unique character to your indoor garden. Case studies demonstrate that using these alternatives can significantly enhance both sustainability and aesthetic appeal in home décor projects.
Tips for Choosing the Best Spray Paint for Planters
Choosing the right spray paint is crucial for ensuring your DIY planters last and look their best. The type of paint you select depends on the material of your planter and the desired finish. For example:
- Acrylic Spray Paint is a great choice for ceramic or terracotta planters, as it provides smooth coverage and vibrant colors.
- Enamel Spray Paint is ideal for metal planters, offering durability and rust resistance.
- Plastic-Specific Spray Paint ensures that paint adheres properly to plastic planters without peeling.
Always opt for paints that are designed for outdoor or multi-surface use to ensure longevity and resistance to fading.
Preparing Your Planters for a Flawless Finish
Achieving a smooth and lasting spray paint job starts with meticulous cleaning and sanding of your planters. Begin by removing any dirt or residue using a mild detergent and water solution, ensuring the surface is spotless. Once dry, sand the planter’s exterior with fine-grit sandpaper to create a slightly rough texture, which promotes better paint adhesion. This step is crucial for preventing peeling and ensuring that your chosen color lays evenly.
Before diving into the vibrant world of colors, applying a high-quality primer is non-negotiable. Primer serves as a foundation, enhancing the bond between the planter and the spray paint while also highlighting the paint’s true hue. To apply primer effectively, use smooth, even strokes and allow sufficient drying time as per the manufacturer’s instructions. Proper priming not only boosts durability but also minimizes the number of paint coats needed, saving both time and resources.
When customizing your planters, strategic masking can make all the difference. Use painter’s tape to cover areas you want to keep unpainted or to create sharp lines between different colors. This technique allows for creative designs and professional-looking results without the hassle of messy edges. Additionally, masking helps protect surfaces like drainage holes, ensuring the functionality of your indoor plants remains uncompromised.
Pro Tips for a Smooth, Even Spray Painting Finish
Achieving a flawless finish requires a steady hand and some careful preparation. Here are some professional tips to get the best results:
- Apply in Thin Layers: It’s better to apply several thin layers rather than one thick coat. This prevents drips and allows for even coverage.
- Use Even Strokes: Keep the can about 8–12 inches away from the surface and spray in smooth, even strokes. Start spraying off the edge of the planter and move across it without stopping to avoid pooling.
- Avoid Windy Days: Spray painting works best in calm conditions. Wind can cause uneven coating and may lead to the paint overspraying onto unwanted areas.
Mastering Spray Painting Techniques for Beautiful Designs
Unlock the full potential of your indoor planters by mastering various spray painting techniques. Whether you’re into layering colors for a vibrant look, stenciling intricate patterns, or distressing for a rustic charm, each method adds a unique personality to your plant displays.
Explore popular color combinations and patterns that perfectly complement indoor spaces:
- Layering: Combine different shades of the same color to create depth and dimension.
- Stenciling: Use patterns like geometric shapes or botanical motifs to add detailed designs.
- Distressing: Achieve a weathered, vintage finish by lightly sanding after each coat.
Refer to the table below for a quick guide on applying each technique effectively:
|
Technique
|
Steps
|
|---|---|
|
Layering
|
|
|
Stenciling
|
|
|
Distressing
|
|
Common Mistakes to Avoid When Spray Painting Planters
While spray painting can be a fun and rewarding DIY project, it’s easy to make a few common mistakes. Here’s what to avoid:
- Not Cleaning Planters Properly: Any dirt or residue on the surface can prevent paint from adhering properly. Be sure to clean and dry your planters thoroughly before painting.
- Skipping Primer: A primer is essential for paint adhesion and will help ensure the final color is vibrant. Skipping this step can lead to uneven paint and premature chipping.
- Applying Paint Too Quickly: Rushing the application process can result in unsightly streaks and uneven coverage. Take your time and follow each step carefully.
Applying Protective Coatings for Durability and Shine
Once you’ve nailed that spray paint job on your planters, the real magic happens when you apply a protective coating. Think of it as the armor your DIY masterpiece needs to fend off the daily grind. There are mainly three types of finishes you can go for: clear sealants, matte finishes, and glossy finishes. Each has its perks—clear sealants offer a versatile look that preserves your paint’s original color, matte finishes give a sophisticated, no-gloss vibe, and glossy finishes amp up the shine, making colors pop like nobody’s business.
Applying these coatings isn’t rocket science, but doing it right can make or break your planter’s lifespan. Start by ensuring your painted planter is completely dry. Use smooth, even strokes to apply the coating, whether you’re using a spray can or a brush. This ensures uniform protection and prevents any unsightly streaks or bubbles. To give you a clearer picture, check out the comparison table below:
|
Type of Coating
|
Finish
|
Best For
|
Durability
|
|---|---|---|---|
|
Clear Sealant
|
Transparent
|
Preserving original paint colors
|
High
|
|
Matte Finish
|
Non-glossy
|
Modern, understated look
|
Medium
|
|
Glossy Finish
|
Shiny
|
Vibrant, eye-catching designs
|
High
|
To keep your planters looking fresh, maintain the finish by gently wiping them with a damp cloth when needed and avoiding harsh chemicals that can strip away the protective layer. Regular maintenance not only keeps your planters glistening but also extends the life of your hard work. Remember, a little care goes a long way in preserving the durability and aesthetic appeal of your DIY spray-painted planters.
Eco-Friendly Tips for Spray Painting Planters
For those looking to make more sustainable choices in their DIY projects, here are a few eco-friendly spray painting tips:
- Low-VOC Spray Paints: Look for paints with low volatile organic compounds (VOCs), which are less harmful to the environment and indoor air quality.
- Repurpose Old Containers: Instead of buying new planters, consider repurposing old or unused containers. Spray painting them a fresh color gives them new life and saves money.
- Proper Disposal: Make sure to dispose of any paint cans and supplies responsibly. Many local recycling centers accept used spray paint cans, so check your local guidelines for eco-friendly disposal.
Integrating Your DIY Planters into Your Home Decor
Transforming your space with spray painted planters can breathe new life into any room. Imagine placing vibrant planters in your living room to create a focal point, or adorning your kitchen with herb-friendly designs that add both style and functionality. In your office, strategically placed planters can enhance your work environment, boosting both aesthetics and productivity. To achieve a cohesive look, pair your planters with modern plant stands or rustic shelves that complement their color and style.
Selecting the right soil types and plant species is crucial for maintaining the health and beauty of your indoor garden. For instance, succulents thrive in well-draining soil and look stunning in bright, bold planters, while ferns prefer more moisture-retentive mediums and muted tones. Below is a comparison table to help you choose the best combinations for your space:
|
Plant Type
|
Preferred Soil
|
Ideal Planter Style
|
Suggested Accessories
|
|---|---|---|---|
|
Succulents
|
Well-draining cactus mix
|
Brightly colored, geometric designs
|
Metal plant stands, decorative rocks
|
|
Ferns
|
Moisture-retentive potting soil
|
Muted, earthy tones with texture
|
Wooden shelves, moisture trays
|
|
Herbs
|
Aerated, nutrient-rich soil
|
Functional yet stylish, like terracotta
|
Window sills, vertical herb racks
|
For a dose of inspiration, check out our mini gallery below featuring diverse setups from minimalist to eclectic styles. Whether you prefer a sleek, monochromatic look or a burst of color and pattern, there’s a DIY planter arrangement to match your personal taste and elevate your home’s interior design.
Adding Personal Touches: Customizing Your Planters
Your DIY spray painted planters should reflect your unique style. Here are a few ways to add personal touches:
- Use Stencils: Stencils are a great way to create intricate patterns or designs on your planters. From geometric shapes to floral motifs, you can transform a plain planter into a work of art.
- Layer Paints: Combine different colors or finishes to add depth and dimension to your design. Ombre effects, metallic accents, and bold patterns are all options to explore.
- Add Decorative Elements: Embellish your planters with additional features like rope, beads, or even small mirrors for an extra layer of texture and creativity.
Troubleshooting Common Spray Painting Issues
Even with careful planning, spray painting DIY planters can sometimes lead to unforeseen issues. Here’s how to troubleshoot some common problems:
1. Paint Drips and Runs
Cause: Applying too much paint in a single coat or spraying too closely to the surface.
Solution: To avoid drips, always apply thin, even layers. Hold the spray can 8–12 inches from the planter and use light, sweeping motions. If drips appear, lightly sand the affected area once dry and apply another thin coat.
2. Uneven Coverage
Cause: Inconsistent spraying, not allowing each coat to dry fully before applying the next, or spraying from an awkward angle.
Solution: Ensure each coat dries completely before adding the next one. Use smooth, even strokes, and avoid over-spraying one section. If you notice uneven spots, you can touch them up with additional light coats.
3. Peeling or Chipping Paint
Cause: Poor surface preparation, skipping primer, or exposure to harsh conditions before the paint fully cures.
Solution: Always clean and sand your planters before painting. Apply a primer to improve paint adhesion. If the paint begins to peel, it’s often a sign that the surface wasn’t prepared properly or the paint wasn’t allowed to cure completely. Re-sand the area, prime again, and repaint.
4. Paint Not Adhering Well
Cause: Using the wrong type of spray paint for the planter material or not using a primer.
Solution: Ensure that the spray paint you’re using is suitable for the type of planter material (e.g., ceramic, plastic, metal). Always apply a primer before painting, as it helps the paint stick and enhances durability.
5. Streaks or Uneven Finish
Cause: Spraying too quickly, too slowly, or applying too much paint in one spot.
Solution: Spray in light, consistent layers. Always start spraying off the planter and move in one smooth, continuous motion. If streaks appear, let the paint dry, then lightly sand the affected area and add another coat.
6. Faded or Dull Color
Cause: Lack of protective coating or exposure to sunlight and other elements.
Solution: To prevent fading, apply a protective topcoat after your spray paint has dried. A glossy or matte finish sealant helps preserve the color and ensures durability. Additionally, avoid placing painted planters in direct sunlight for extended periods, as UV rays can cause the paint to fade over time.
Frequently Asked Questions
What type of spray paint is best for different planter materials?
Choosing the right spray paint depends on the planter material. For terracotta and ceramic planters, acrylic-based spray paints work well as they provide good coverage and durability. Metal planters benefit from enamel spray paints, which offer a strong finish and resist rust. For plastic planters, look for spray paints specifically designed for plastics to ensure proper adhesion and flexibility.
How can I ensure my spray paint design lasts longer?
To extend the lifespan of your spray paint design, always start by thoroughly cleaning and sanding the planter to remove any dirt or gloss. Apply a suitable primer to improve paint adhesion. After painting, use a high-quality protective coating, such as a clear sealant, to protect the finish from moisture and wear. Additionally, avoid placing painted planters in areas with extreme temperature changes to prevent cracking or peeling.
Can I use multiple colors on a single planter, and how?
Yes, you can use multiple colors on a single planter to create vibrant and unique designs. To achieve clean lines and sharp edges, use painter’s tape to mask off areas where different colors will be applied. Start with the base color and allow it to dry completely before applying additional colors. Techniques like stenciling or layering spray paints can add depth and complexity to your design. Always ensure each layer is dry before adding the next to prevent colors from bleeding.
What are some eco-friendly spray paint options available?
For eco-conscious projects, look for spray paints labeled as low-VOC (volatile organic compounds) or water-based. Brands like Montana and Rust-Oleum offer environmentally friendly options that are less harmful to the environment and safer to use indoors. Additionally, you can consider using natural primers and sealants made from sustainable materials to further reduce your project’s environmental impact.
How can I personalize my planters to match my home’s aesthetic?
Personalizing your planters involves selecting colors and designs that complement your home’s décor. Consider using colors that match or accent existing furniture, walls, or accessories. You can also incorporate patterns or motifs that reflect your style, such as geometric shapes for a modern look or floral designs for a more traditional feel. Adding unique elements like metallic finishes, textured paints, or decorative accents can further enhance the planters and make them a seamless part of your interior design.
Conclusion
Transforming your indoor space with DIY spray painted planters is not only a rewarding project but also a creative way to enhance your home décor. By selecting the right planters, using the best spray paint, and mastering key techniques, you can achieve stunning, customized designs that reflect your unique style. From ensuring proper preparation and applying protective coatings to adding eco-friendly touches, every step contributes to a beautiful and durable finished product. Whether you’re aiming for a minimalist look, vibrant patterns, or personalized details, your spray painted planters can truly elevate your indoor garden and become a conversation piece. Now that you’re equipped with all the tips and tricks, it’s time to embrace your creativity and get started on your DIY journey—transforming your home with gorgeous, handmade planters that breathe new life into any room.