
Have you ever wondered how to achieve a flawless DIY spray paint job on your car and give it a showroom finish right from your garage? Whether you’re aiming to rejuvenate a faded exterior, cover up imperfections, or add a personalized touch to your vehicle, DIY spray painting your car is easier than you think. In our comprehensive guide, From Faded to Flawless: A Step-by-Step Guide to Spray Painting Your Car, we cover everything you need to know. From selecting the best spray paint for cars to setting up a safe and efficient workspace, we provide expert advice on preparing your vehicle’s surface and mastering spray painting techniques. With clear, actionable tips and detailed instructions, this guide will help you transform your car’s appearance and achieve professional-quality results that last. Perfect for DIY enthusiasts looking to enhance their vehicle on a budget!
Selecting Quality Paint and Supplies
When embarking on your spray painting journey, choosing the right paint sets the foundation for a stunning finish. Acrylic, enamel, and urethane paints each bring unique benefits to the table:
- Acrylic Paint: Budget-friendly and user-friendly, perfect for beginners seeking vibrant colors.
- Enamel Paint: Offers a durable, glossy finish, making it ideal for vehicles that need extra protection against the elements.
- Urethane Paint: Provides superior durability and a high-gloss sheen, favored by professionals aiming for a flawless, long-lasting finish.
Equipping yourself with the right supplies is equally important to ensure a smooth and efficient painting process. Essential items include:
- Spray Guns: Ensure even paint application for a uniform and professional look.
- Primers: Enhance paint adhesion and prevent issues like rust and peeling.
- Sandpaper: Prepares the car surface by smoothing imperfections, ensuring the paint adheres properly.
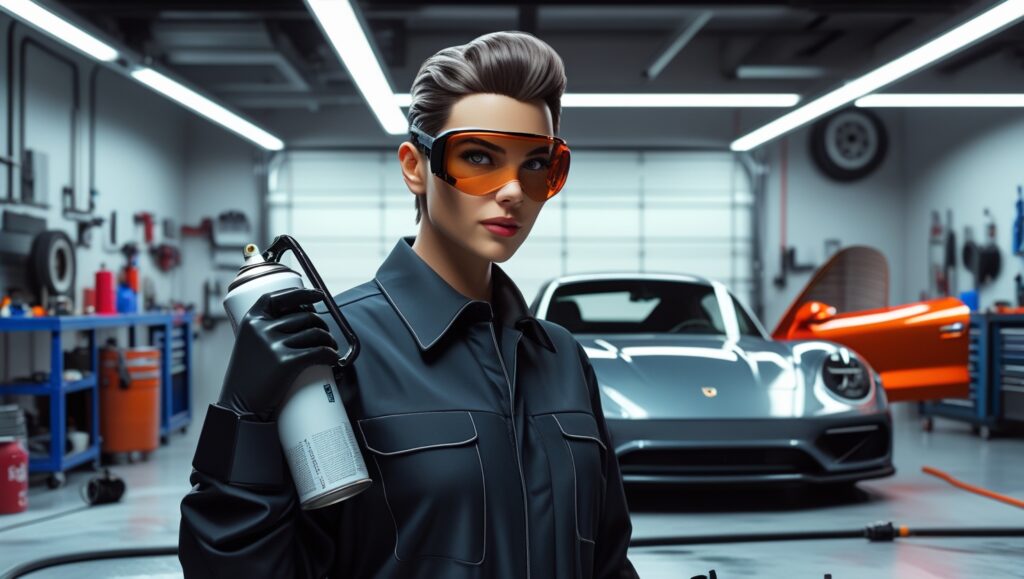
- Protective Gear: Safety is paramount; invest in masks, gloves, and goggles to protect yourself during the painting process.
By carefully selecting high-quality paint and the right supplies, you’ll set yourself up for success, transforming your car from faded to flawless with ease.
Choosing the Right Tools for the Job
To achieve a flawless paint job, the right tools are just as important as the right materials. Here’s a breakdown of the essential tools you’ll need:
- Spray Guns: A quality spray gun ensures even coverage and precise application. You can choose between HVLP (High Volume Low Pressure) spray guns, which minimize overspray and are perfect for beginners, or a more traditional spray gun if you’re aiming for a professional finish.
- Air Compressor: An air compressor is a crucial tool if you’re using a spray gun. It controls the pressure, allowing for consistent, even coverage without clogging or excessive splattering.
- Sanders: If you’re working with a larger surface area or need to remove a lot of old paint, a power sander can speed up the process. For finer detail work, you might want to use manual sandpaper.
- Masking Tape & Plastic Sheeting: These items help protect areas you don’t want to paint, such as windows, tires, and trim. A sharp line of masking tape ensures clean edges and prevents overspray.
- Paint Stirrer & Strainers: Make sure your paint is well-mixed and free of debris. Stir it thoroughly and use a strainer to ensure smooth application without any lumps or contaminants.
Setting Up a Safe and Efficient Painting Area
Creating a safe and efficient painting area is your first step to achieving a flawless car finish. Whether you choose to work indoors or outdoors, ensuring your workspace is clean and well-ventilated can make or break your project. Experts suggest setting up in a space with ample airflow to prevent harmful fumes from accumulating, which not only protects your health but also ensures the paint dries evenly.
Protecting your surroundings from overspray is non-negotiable. Lay down drop cloths to shield floors and nearby objects, and use high-quality masking tape to cover edges and trims that shouldn’t be painted. Think of it as creating a controlled environment where every spray counts. Follow this checklist to stay organized: ensure all items are removed or covered, verify ventilation is optimal, and double-check that your masking is secure. By prioritizing these setup steps, you set the stage for a smooth and professional-looking paint job.
Remember, a meticulous setup not only safeguards your workspace but also enhances the quality of your finish. As industry experts often emphasize, “A well-prepared area is half the battle won.” Don’t cut corners—invest the time upfront to create a protected and optimized painting area, and your car will thank you with that impeccable, showroom-worthy shine.
Preparing Your Car’s Interior and Windows
While the exterior of your car is the primary focus of your DIY spray painting project, taking the time to properly prepare the interior and windows is crucial to achieving a professional finish and preventing costly mistakes. Here’s a step-by-step guide to help you prepare these areas effectively:
1. Cover the Interior: Before starting the spray painting process, protect your car’s interior from accidental overspray, which can ruin the upholstery and dashboard. Use large plastic sheeting or painter’s tarps, which are designed to shield surfaces from paint splatters. Start by draping the sheeting over the seats, dashboard, and any other parts of the interior that you don’t want painted. Secure the sheeting with painter’s tape, ensuring it’s tightly fastened to prevent it from shifting while you work. If your car has floor mats, it’s a good idea to remove them to avoid any paint stains, or alternatively, cover them with drop cloths or plastic.
2. Protect the Windows: Paint splatters on your car windows can be a nightmare to remove, so it’s essential to cover them properly. Use masking tape and plastic sheeting or painter’s plastic to completely shield your windows from overspray. Start by carefully taping around the edges of the windows to create a clean seal. Ensure the tape adheres securely to the trim and that no gaps remain. Once the edges are taped, drape the plastic over the entire window, making sure it covers every inch of glass and extends slightly beyond the edges of the tape for extra protection. For an even more secure seal, press the plastic down along the edges of the tape to ensure no gaps that could let paint in.
3. Remove or Mask Off Small Interior Items: In addition to the main areas like the seats and dashboard, it’s also wise to remove or cover smaller interior items that might get in the way. This includes the rearview mirror, air vents, and door handles. If you can’t remove them, simply mask them off with tape and plastic to avoid any paint buildup in those hard-to-reach areas. Be thorough to ensure that no part of your car’s interior is left exposed to the paint.
By following these steps to properly protect the interior and windows, you’ll ensure that your focus remains solely on achieving a flawless finish on the exterior without the risk of damaging your car’s interior surfaces.
Removing Imperfections and Sanding the Vehicle
Achieving a flawless finish starts with meticulously cleaning your car’s surface to eliminate dirt, grease, and old paint. Use a high-quality degreaser and a soft brush to ensure every area is spotless, providing a pristine canvas for the next steps.
Addressing rust, dents, and other imperfections is essential. Begin by removing any rust spots with a suitable rust converter or sanding tool. For dents, apply a body filler and shape it carefully to match the car’s contours. Follow these key steps to prepare your vehicle:
- Clean the surface thoroughly to remove all contaminants.
- Remove rust using appropriate tools or treatments.
- Repair dents with body filler, ensuring a smooth finish.
Once the imperfections are handled, move on to sanding. Start with a coarse grit sandpaper (around 80-grit) to smooth out major flaws, then progressively switch to finer grits (up to 400-grit) to create an even, smooth base. Consistent sanding in circular motions will ensure a uniform surface, perfectly primed for the spray painting process.
Applying Primer for a Smooth Base
Getting the primer right is crucial for ensuring your car’s new paint job sticks and lasts. Start by choosing a high-quality automotive primer that matches your car’s paint type. Even application is key—use steady, overlapping strokes to cover every inch without missing spots. This not only enhances paint adhesion but also prevents peeling and flaking down the line.
Don’t rush the drying process. Allow each coat of primer to fully dry according to the manufacturer’s instructions before moving on. Once dry, lightly sand the surface with fine-grit sandpaper to eliminate any imperfections and create a perfectly smooth foundation for your topcoat. This step ensures that the final paint layer looks flawless and professional, giving your car that showroom shine.
Spray Painting: Techniques for Even Coverage
When it comes to spray painting your car, achieving even coverage is non-negotiable for that sleek, professional finish. Experts’ advice highlights the importance of maintaining a consistent distance—typically around 6-8 inches—from the surface. This precision helps prevent pesky runs and sagging that can derail your project. Keep your movements steady and deliberate, ensuring each spray pass overlaps slightly to avoid missed spots and uneven layers.
Avoid the common trap of over-applying paint in one area, which can lead to drips and a blotchy appearance. Instead, focus on applying multiple thin coats, allowing each layer to dry thoroughly before adding the next. This approach not only enhances coverage consistency but also contributes to the durability of your paint job. For a visual guide, check out our comprehensive video tutorial that demonstrates the perfect spraying techniques and setups to transform your car from faded to flawless.
Dealing with Common Issues: How to Fix Mistakes
Even with careful preparation, mistakes can happen. Here’s how to handle some of the most common issues:
- Runs and Drips: If you notice a drip or run in the paint, don’t panic! Wait for it to dry completely, then lightly sand the area with fine-grit sandpaper. Reapply the paint in thin coats until the finish is smooth.
- Orange Peel Texture: If the paint finish looks bumpy or textured (resembling the peel of an orange), you may have applied the paint too thickly. Sand the area down and reapply with thinner coats.
- Fading or Uneven Coverage: Sometimes, the paint can appear uneven or faded in spots. This often happens if the paint dries too quickly in certain areas. Apply additional coats, ensuring each layer is evenly spread and dried.
How to Achieve Professional Results with the Right Spray Techniques
To ensure your DIY spray painting job looks as professional as possible, follow these expert techniques:
- Practice on a Test Panel: Before applying the paint to your car, test the spray gun or spray cans on a scrap piece of metal or cardboard. This will help you adjust the spray pattern and pressure for a consistent finish.
- Spray in Thin Coats: Avoid the temptation to apply a thick coat in one go. Thin, even coats allow the paint to dry properly between layers, giving you a smoother finish. Start from the top and work your way down to prevent drips from ruining your hard work.
- Use the “W Pattern” Technique: Move the spray gun in a “W” or “M” pattern across the surface of your car. This technique ensures even coverage and helps reduce the risk of heavy streaking or splotching.
Sealing and Protecting Your Paint Job
Once your car’s new finish is in place, sealing it properly is crucial for long-lasting protection. Applying a high-quality clear coat not only enhances the shine but also acts as a barrier against environmental elements like UV rays, road salt, and debris. Choosing the right sealant ensures that your paint job remains pristine and resistant to scratches and fading over time.
After applying the clear coat, the curing process begins, which typically takes anywhere from 24 to 72 hours depending on the product used and environmental conditions. During this period, it’s important to keep your vehicle in a dust-free environment to prevent imperfections. For ongoing paint maintenance, regularly applying a good wax can significantly extend the life of your sealant, keeping your car looking flawless and well-protected.
|
Sealant
|
Durability
|
Ease of Application
|
Price Range
|
Best For
|
|---|---|---|---|---|
|
Meguiar’s Ultimate Sealant
|
Up to 6 months
|
Easy spray application
|
$30 – $35
|
High-gloss finishes
|
|
Turtle Wax T-5 Supersonic
|
4 months
|
Brush-on or spray
|
$15 – $20
|
Budget-friendly protection
|
|
Quik Sheen Quick Detailer
|
3 months
|
Quick spray and wipe
|
$25 – $30
|
Convenient maintenance
|
|
Chemical Guys JetSeal
|
7 months
|
Professional-grade spray
|
$35 – $40
|
Maximum durability
|
Why You Should Wait to Apply Clear Coat
The final step to achieving that shiny, professional finish is applying a clear coat. However, timing is everything:
- Patience Pays Off: Make sure your paint has dried completely before applying the clear coat. This can take anywhere from 24 to 48 hours, depending on your paint and environmental conditions.
- Curing Process: Once you’ve applied the clear coat, give it enough time to cure properly—usually 48 hours or more. Rushing the curing process could lead to imperfections like fingerprints or smudges.
Final Touches: Polishing Your Newly Painted Car
After your paint has fully cured, it’s time to make it shine! Here’s how you can ensure your car looks flawless:
- Polishing: Use a fine polish to bring out a high gloss on the paint. Apply the polish in small, circular motions with a microfiber cloth.
- Buffing: After applying polish, use a soft buffing pad to achieve a smooth, glossy surface. Buffing helps remove any minor imperfections and ensures an even shine across the entire car.
- Waxing: Applying a coat of wax after polishing not only enhances the shine but also protects your car’s new paint job from UV rays, road grime, and other environmental elements.
Understanding the Importance of Weather Conditions
The weather plays a significant role in the success of your spray painting project. Here are some essential tips:
- Avoid Painting on Humid Days: High humidity can cause paint to dry too slowly, leading to poor adhesion and an uneven finish. The ideal humidity level is below 50%.
- Optimal Temperature: Painting your car in temperatures between 60°F and 80°F (15°C – 27°C) provides the best results. Too hot or too cold can affect the paint’s drying time and finish.
Frequently Asked Questions
How long should I allow each coat of paint to dry?
Drying times can vary depending on the type of paint used and environmental conditions. Typically, each coat should dry for at least 15-30 minutes before applying the next layer. Always refer to the manufacturer’s instructions for precise drying times to ensure optimal results.
What tools are essential for achieving a professional finish?
Essential tools include a quality spray gun, air compressor, sandpaper of various grits, masking tape, drop cloths, primer, and protective gear such as masks and gloves. Investing in high-quality equipment can make a significant difference in the smoothness and durability of your paint job.
Can I paint my car myself, or should I seek professional help?
While it’s possible to paint your car yourself with the right tools and preparation, achieving a flawless finish requires time, patience, and attention to detail. For complex jobs or if you’re unsure about the process, consulting a professional painter might be the best option to ensure high-quality results.
How can I prevent paint from peeling or chipping after application?
Proper surface preparation, including thorough cleaning and sanding, ensures good paint adhesion. Applying multiple thin coats rather than one thick layer helps prevent peeling and chipping. Additionally, using a high-quality primer and clear coat can enhance the durability of your paint job.
What maintenance steps should I take to preserve my newly painted car?
Regular washing with gentle cleaners, avoiding abrasive materials, and applying wax periodically can help maintain the paint’s appearance. It’s also advisable to park in shaded areas or use a car cover to protect the paint from harsh sunlight and environmental elements.
Conclusion
Transforming your car from faded to flawless with DIY spray painting is a rewarding process that combines creativity and skill. By carefully selecting quality materials, preparing your car’s surface, and following expert spray techniques, you can achieve a professional finish right from the comfort of your garage. Remember, patience is key—take the time to properly prepare your workspace, use thin, even coats, and seal your work for lasting results. Whether you’re looking to refresh a tired exterior or add a personal touch, spray painting your car is a cost-effective way to enhance its appearance. With these tips and techniques, you’ll not only save money but also develop a new DIY skill that will leave your car looking like it just rolled off the showroom floor.