
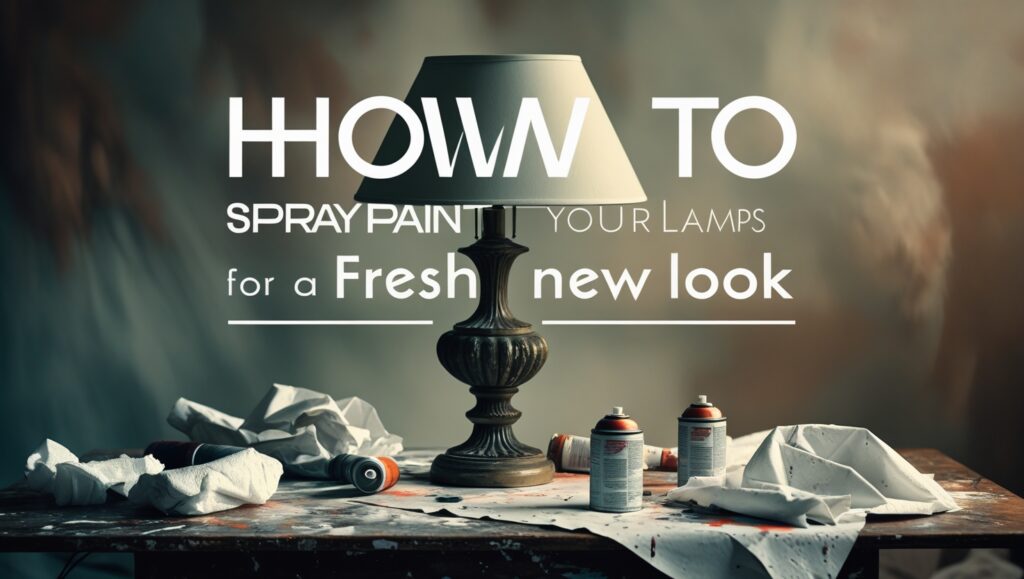
Are you tired of your old lamp design and looking for an affordable way to refresh your home décor? With a simple can of spray paint and a few easy steps, you can learn how to spray paint your lamps, giving them a dazzling new look that fits your style. In this guide, we’ll show you how to spray paint your lamps quickly and cost-effectively, making your space feel refreshed without breaking the bank.
Spray painting lamps is a fantastic way to personalize your space, whether you’re aiming for bold colors, elegant neutrals, or a custom finish. This DIY project is perfect for homeowners, renters, and DIY enthusiasts alike. Ready to get started? Let’s dive into the step-by-step process of spray painting lamps and learn how to make your lamps shine!
Why Spray Paint? The Benefits of This DIY Transformation
Spray painting is a fast, versatile, and budget-friendly way to revitalize almost any household item. Lamps, in particular, are excellent candidates because they serve as focal points in a room. With spray paint, you can update the look of a lamp to match changing color schemes or seasonal décor, all with minimal materials and effort.
Key Benefits of Spray Painting Your Lamps:
- Cost-effective: A can of spray paint is far cheaper than purchasing a new lamp.
- Customization: Choose any color, finish, or style to match your decor.
- Eco-friendly: By upcycling your old lamps, you’re reducing waste and repurposing existing items.
Shine On: Transforming Your Lamps with Spray Paint
Are you looking for an easy way to refresh your home décor? One exciting project you can tackle is transforming your lamps with spray paint. This simple technique allows you to breathe new life into old or outdated lamps, giving them a modern and vibrant look. Here’s how you can achieve stunning results with just a few steps.
Gather Your Supplies
Before you dive into painting, make sure you have all the necessary materials on hand. Here’s a list to get you started:
- Spray paint: Choose a color that complements your room. Look for paint designed specifically for metal, wood, or plastic, depending on your lamp’s material.
- Drop cloth: Protect your surfaces with a drop cloth or newspaper to avoid any mess.
- Masking tape: Use this to cover areas you don’t want to paint, such as the lamp’s socket or wiring.
- Sandpaper: A light sanding of the lamp can help the paint adhere better.
- Sealant spray: For added protection and a finished look, a clear sealant can be applied after painting.
Prepare the Lamp
Before you start painting, it’s essential to prep your lamp properly. Here’s how:
- Unplug the lamp: Safety first! Always unplug your lamp to avoid any electrical hazards.
- Remove any parts: Take off bulbs, shades, and any removable components.
- Clean the lamp: Wipe down the lamp to remove dust and grease. A clean surface ensures that the paint adheres well.
- Sanding: If the lamp has a glossy finish, lightly sand it with fine-grit sandpaper. This will create a texture for the paint to grip onto.
- Masking: Use masking tape to cover any areas that you don’t want painted.
Spray Painting Process
Now that you’ve prepared your lamp, it’s time to bring out the spray paint!
- Choose your spray paint location: Find a well-ventilated area to work in, ideally outdoors or in a garage.
- Shake the can: Before use, shake the spray paint can well to mix the paint evenly.
- Test spray: Test the spray on a piece of cardboard to ensure an even coat and correct color.
- Start spraying: Hold the can about 10-12 inches away from the lamp. Use smooth, sweeping motions for even coverage.
- Apply multiple coats: To achieve a vibrant color, apply several thin coats rather than one thick coat. Allow each coat to dry completely before applying the next.
Finishing Touches
Once you’re happy with the color, it’s time to add some final touches:
- Clear sealant: After the paint has dried, use a clear sealant to protect your new finish. This will help prevent scratches and keep the color looking fresh.
- Reassemble the lamp: Carefully remove the masking tape and reassemble any parts you took off earlier.
- Test it out: Plug in the lamp to ensure everything works properly, and enjoy your newly transformed piece!
Tips for Success
Here are some extra tips to ensure your spray painting project goes smoothly:
- Always spray in an area away from wind to prevent dust and debris from sticking to the wet paint.
- Wear a mask to protect yourself from fumes and goggles to shield your eyes.
- Consider using a primer that’s compatible with your spray paint for a more durable finish.
Transforming your lamps with spray paint is not only cost-effective but also a fun way to personalize your home. With this guide in hand, you can easily achieve a fresh new look for your space. So grab your supplies and get ready to shine on!
Choosing the Right Spray Paint for Your Lamp Project
If you’re looking to refresh the look of your lamps, choosing the right spray paint is essential. The right paint not only enhances the aesthetics but also ensures durability. Here’s what you need to know about selecting the perfect spray paint for your lamp project.
1. Consider the Surface Material
The first step in choosing spray paint is to identify the material of your lamp. Different materials require specific paint types:
- Metal: For metal lamps, opt for spray paint designed for metals to achieve a smooth finish and great adhesion.
- Wood: If your lamp is made of wood, choose a paint that offers good coverage. Look for options that mention they are suitable for wood surfaces.
- Plastic: Use paints that specifically state they work well with plastic to avoid peeling and chipping.
2. Pick the Right Finish
The finish of the spray paint affects the final look of your lamp. Common finishes include:
- Matte: This finish is non-reflective and gives a rustic vibe. It’s great for a soft, understated look.
- Satin: A satin finish provides a slight sheen, offering elegance while remaining versatile.
- Glossy: Glossy finishes are bright and eye-catching. They are ideal for making a statement piece.
3. Opt for Indoor or Outdoor Paint
When considering the location of your lamp, ensure you select the right type of spray paint:
- Indoor Spray Paint: Perfect for lamps that stay indoors. These paints typically have a lower VOC content and are less harsh on indoor air quality.
- Outdoor Spray Paint: Choose outdoor paint if the lamp is exposed to moisture or extreme conditions, as these paints are more resistant to fading and weather-related wear.
4. Check for Primer Compatibility
Some spray paints come with built-in primers, which can save time and ensure better adhesion. However, if your lamp requires a separate primer:
- Use a primer specifically designed for the surface material of your lamp.
- Priming can help achieve a more even base and enhance the color vibrancy of your spray paint.
5. Review Color Options
Color selection is subjective, so consider the overall design theme of your space. Take samples of the paint, if possible, to see how they look in different lighting conditions. You might want to consider:
- Neutral Colors: Whites, blacks, and greys complement most decor.
- Bold Colors: Reds, blues, and yellows can become focal points in the room.
- Metallic Shades: Gold, silver, and bronze add an upscale and trendy look.
6. Safety and Environmental Considerations
When spray painting, safety should always be a priority. Here are some tips to keep in mind:
- Work in a well-ventilated area or outdoors.
- Wear a mask and goggles to protect yourself from fumes and overspray.
- Check the cans for non-toxic and low-VOC options, which are better for your health and the environment.
7. Brand Reputation and Reviews
Before making your purchase, do a little research on different brands. Check customer reviews to see how others liked the paint. Some reputable brands in the spray paint market include:
- Rust-Oleum: Known for its durability and variety of finishes.
- Krylon: Offers vibrant colors and quick drying times.
- Montana Gold: Popular among DIY enthusiasts for its extensive color palette.
With these detailed strategies in mind, you’re well on your way to selecting the right spray paint for your lamp project. Remember that the right paint not only enhances the beauty of your lamp but also ensures it stands the test of time. So, take your time to choose wisely, and enjoy the transformation!
Step-by-Step Guide to Spray Painting Lamps Safely
Spray painting lamps is an exciting way to breathe new life into your home decor. By giving your old lamps a fresh look, you can seamlessly blend them into your updated style. Below is a comprehensive guide to spray painting your lamps safely, ensuring you achieve beautiful results without any mishaps.
Gather Your Supplies
Before you start your project, it’s essential to gather all the necessary materials. Here’s what you’ll need:
- Spray primer (optional)
- Spray paint (in your desired color)
- Drop cloth or newspaper
- Masking tape
- Sandpaper (fine grit)
- Protective goggles
- Face mask
- Gloves
- Lightly damp cloth
Prepare Your Workspace
A well-ventilated area is crucial for spray painting safely. Follow these steps to set up your workspace:
- Choose an outdoor location or a well-ventilated indoor space, like a garage with open doors and windows.
- Lay down a drop cloth or newspaper to protect surfaces from paint drips.
- Remove the lamp shade and bulb, and make sure the lamp is unplugged.
Clean and Prep Your Lamp
Cleaning your lamp ensures better paint adhesion. Here’s how to prep your lamp:
- Wipe the lamp with a lightly damp cloth to remove dust and dirt.
- If your lamp has a glossy finish, gently sand it with fine-grit sandpaper to create a rougher surface for the paint to stick to.
- Apply masking tape to areas you don’t want to paint, such as the electrical components or decorative accents.
Apply Primer (If Necessary)
Using a spray primer can enhance the final finish of your lamp. This step is especially helpful if you’re painting a light color over a dark finish. Here’s how:
- Shake the primer can vigorously as instructed on the label.
- Hold the can about 12 inches away from the lamp and apply a light coat, moving in sweeping motions.
- Allow the primer to dry completely as per package instructions.
Spray Paint Your Lamp
Now for the fun part! Follow these tips to spray paint your lamp:
- Shake the spray can thoroughly for even distribution of color.
- List the lamp’s height as a guideline for distance. Keeping about 12-18 inches away will help you achieve an even coat.
- Use smooth, sweeping motions while spraying, and try to cover all areas uniformly.
- Apply several light coats rather than one heavy coat to avoid drips and runs.
Drying Time and Re-Coating
After your initial coats, allow ample drying time to prevent smudging or damage:
- Let the first coat dry according to the manufacturer’s direction. Typically, this is about 20-30 minutes.
- Check for any uneven areas. If needed, lightly sand those spots and apply a second coat.
- Repeat the process until you achieve the desired color and coverage.
Final Touches
Once your lamp is dry, remove any masking tape carefully. Touch up any spots that need more paint, then let it dry fully for your final look. After everything is dried:
- Reattach the lamp shade and bulb.
- Plug the lamp in and admire your handiwork!
Safety Tips
Always prioritize safety while spray painting:
- Wear protective goggles, a face mask, and gloves to avoid inhalation of fumes and contact with paint.
- Ensure your workspace is free from open flames and sources of heat since spray paints are flammable.
- Keep pets and children at a safe distance while painting.
Spray painting your lamps can be a rewarding and enjoyable DIY project. By following these steps, you can transform tired lighting into stunning decor accents without any hassle. So, gather your supplies, set up your workspace, and get ready to shine on with your beautifully painted lamps!
Creative Techniques to Enhance Your Lamp Designs
Are you looking to give your lamps a fun and fresh update? With lots of creative techniques at your fingertips, you can enhance your lamp designs easily. Whether you want to repaint, add artistic elements, or switch up the materials, there are plenty of ways to make your lamps shine brighter in your room.
Revitalize with Spray Paint
One of the simplest and most effective ways to change the look of your lamp is by using spray paint. This technique allows you to cover your lamp in any color that fits your decor. Here’s how to do it:
- Choose a Suitable Paint: Use spray paint made for metal, plastic, or ceramic surfaces to ensure it adheres properly.
- Preparation is Key: Clean the lamp thoroughly and apply a primer if necessary.
- Spray Evenly: Hold the can about 6-12 inches away and move it in a steady, sweeping motion.
- Multiple Coats: Allow each coat to dry completely before applying the next for a professional finish.
Add Texture with Fabric
Fabric can bring a whole new dimension to your lamp design. Wrapping your lamp base in fabric can create a cozy and inviting look. Consider these steps:
- Select Your Fabric: Choose a fabric that matches your style; cotton, burlap, or velvet can work well.
- Cut to Size: Measure the height and circumference of your lamp base, then cut the fabric accordingly.
- Adhere with Glue: Use fabric glue or a hot glue gun to secure the fabric around the base.
- Finish the Edges: Fold over any raw edges and glue them down to keep everything neat.
Try Decorative Paper
Using decorative paper is another easy way to enhance your lamps. You can use patterned scrapbook paper, washi tape, or even gift wrap. Here’s a simple guide:
- Pick Your Paper: Choose a fun or elegant pattern that goes well with your room.
- Measure and Cut: Measure the sections you want to cover and cut the paper to size.
- Glue It Down: Use a glue stick or Mod Podge to adhere the paper to the lamp surface.
- Protect with Sealer: Apply a clear acrylic sealer over the paper to make it more durable.
Embrace Nature with Natural Elements
Using natural elements can add an organic charm to your lamp. This technique is perfect for those who love rustic or boho styles. Consider these tips:
- Include Seashells or Stones: Adorn your lamp base with seashells, stones, or pebbles using glue.
- Wrap with Twine: For a beachy look, wrap twine or jute around the base.
- Incorporate Greenery: Attach artificial leaves or floral elements to give a vibrant touch.
Incorporate Art Techniques
If you enjoy painting or crafting, consider transforming your lamp with artistic techniques. Here are some ideas:
- Stenciling: Use stencils to create fun designs or patterns on your lamp. Just spray or paint right over the stencil.
- Decoupage: Apply cut-out images or patterns onto your lamp with a decoupage medium.
- Hand Painting: If you’re artistically inclined, hand-paint intricate designs for a unique touch.
Switch Up the Shade
Sometimes, all your lamp needs is a new shade to really brighten up its appearance. Here are some pointers:
- Explore Different Shapes: Try out different shapes or sizes to see what works best with your space.
- Choose Vibrant Colors: Bright colors can make a bold statement while neutrals can provide elegance.
- Personalize with Patterns: Select shades with unique patterns, textures, or designs that reflect your personal style.
By implementing these creative techniques, you can easily enhance your lamp designs and ensure they stand out. Let your imagination guide you, and soon enough, your lamps will shine in a whole new light!
Tips for Maintaining Your Newly Painted Lamps
After you have transformed your lamps with fresh spray paint, it’s essential to keep them looking amazing. Proper maintenance ensures they retain their new finish for a longer time while enhancing your home’s ambiance. Here are some helpful tips to keep your newly painted lamps shining brightly.
Cleaning Your Painted Lamps
It’s essential to clean your lamps regularly. Dust and grime can settle on the surfaces, dulling the finish. Use a soft, lint-free cloth to wipe down the lampshade and base. Consider the following cleaning methods:
- Dry dusting: For regular maintenance, simply dust your lamps with a microfiber cloth to remove particulate matter.
- Damp wiping: If the lamp looks more soiled, lightly dampen a cloth with water or a mild soap solution. Make sure it is not too wet to avoid moisture damage.
- Vacuuming: For fabric lampshades, using the upholstery attachment on your vacuum can effectively remove dust without risking damage.
Avoiding Harsh Chemicals
While cleaning is important, using harsh chemicals can harm your painted finish. Stay away from strong solvents or ammonia-based cleaners. Instead, stick to natural cleaning methods or gentle soaps. This keeps your lamps looking good while preserving the integrity of the paint.
Preventing Scratches and Chips
To prevent scratches and chips in your newly painted lamps, consider these protective measures:
- Designate lamp locations: Place lamps out of reach of pets or children who may inadvertently bump into them.
- Use coasters: If your lamp features a base that is prone to slipping, coasters can provide a stable, scratch-free surface.
- Beware of heat: Avoid placing lamps in high-heat areas, as excessive heat can damage the paint and cause it to lift.
Color Touch-Ups
Over time, even the best paint jobs may require a bit of refreshing. If you notice small chips or scratches in the paint:
- Minor touch-ups: Keep a small bottle of leftover spray paint for quick fixes. Use a fine brush to carefully touch up any damaged areas.
- Plan for a bigger refresh: If you have several chips or a faded appearance, consider giving the lamp a complete reseal with new paint.
Protective Coatings and Finishes
Applying a protective coating can enhance the durability of your painted lamps. There are various sealants available, such as clear acrylic or polyurethane spray. Follow these steps when applying:
- Choose the right sealant: Opt for a product compatible with your paint type.
- Application: Coat your lamps in a well-ventilated area, ensuring even coverage.
- Let it dry: Allow the sealant to cure fully before placing the lamp in use again.
Placement Considerations
The environment where you place your painted lamps plays a significant role in their longevity. Consider the following when deciding on placement:
- Indoor vs. outdoor: If your lamps are used outdoors, be aware that exposure to moisture and sunlight can fade the paint. Opt for outdoor-rated spray paints for such situations.
- Humidity levels: High humidity can cause paint to peel. Choose locations with stable temperatures and humidity.
Regular Inspections
Make it a habit to regularly check your lamps for any signs of wear or damage. A little attention goes a long way in maintaining their beauty:
- Physical checks: Inspect for scratches, chips, or fading.
- Functional checks: Ensure cords and light bulbs are in good condition to avoid any electrical hazards.
By following these maintenance tips, you can ensure that the lamps you’ve skillfully spray-painted will continue to shine like new. Keep them clean, protect their surfaces, and offer them some extra care whenever necessary, and your lamps will be a delightful addition to your home décor for years to come.
Conclusion
Revamping your lamps with spray paint is a fun and rewarding project that can completely transform the atmosphere of your space. With the right spray paint, you can choose colors that match or contrast with your décor, providing a stylish focal point in any room. Remember, selecting high-quality, appropriate spray paint ensures both vibrant finishes and longevity for your loved lamps.
As you embark on this creative journey, following a step-by-step guide for safety is essential. Proper ventilation, protective gear, and careful preparation can make the difference between a successful transformation and a messy situation. By employing creative techniques, like stenciling or ombre effects, you can add personal flair to your projects, making those old lamps one-of-a-kind pieces that truly shine.
Once you’ve completed your painting, don’t forget to care for your newly refreshed lamps. Regular cleaning and gentle handling will keep their shine intact and preserve the beauty you’ve worked so hard to achieve. With these tips and techniques, your lamps can become standout features in your home, reflecting your personality and style.
Take the plunge, gather your materials, and start spraying away. With a little creativity and effort, you’ll enjoy the radiant transformation of your lamps, brightening your living spaces with colors that truly resonate with you. Shine on and let your creativity illuminate every corner of your home!