
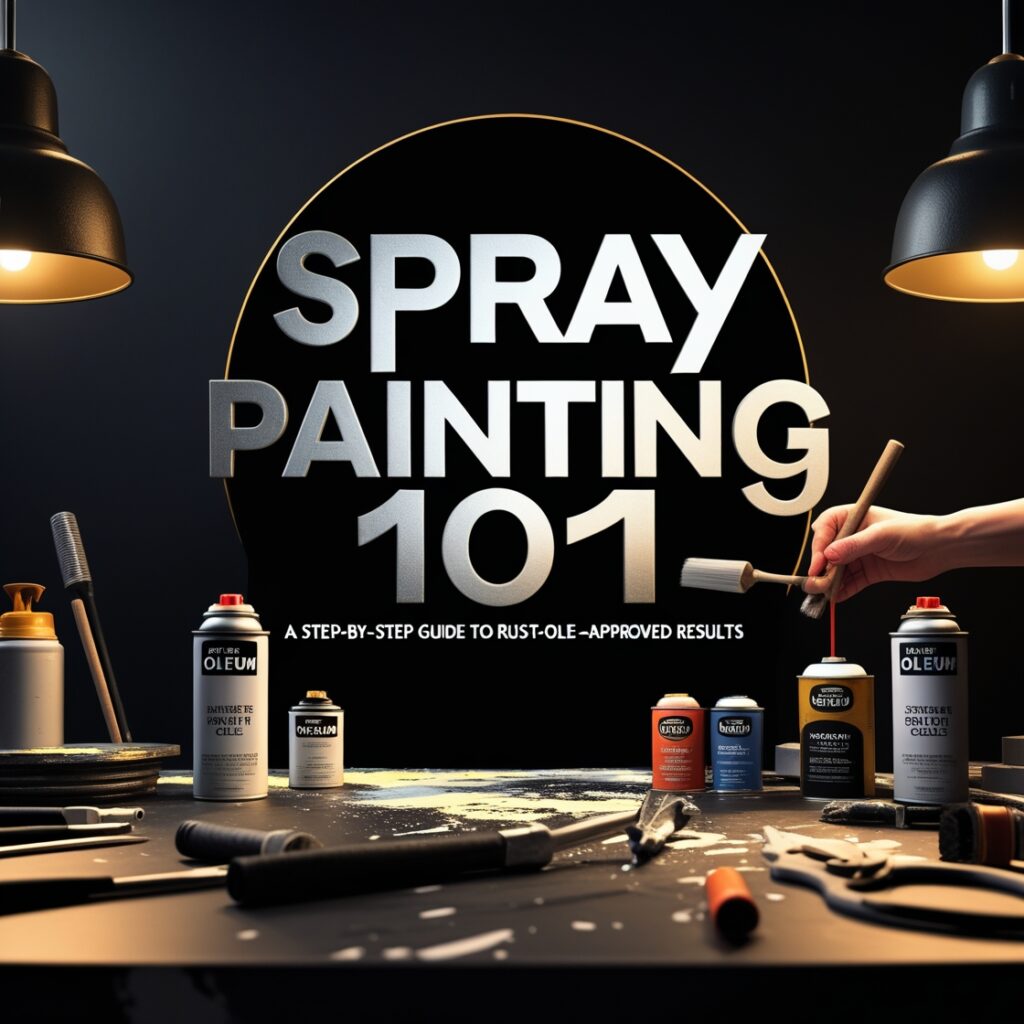
Spray painting has become an increasingly popular method for applying paint to various surfaces, offering a fast, easy, and versatile way to revamp objects, furniture, and decor. In this comprehensive guide, we’ll explore the world of spray painting, covering best practices, techniques, and Rust-Oleum-approved products that will help you achieve exceptional results. Whether you’re a seasoned DIY enthusiast or a novice, this step-by-step guide will equip you with the skills and confidence to tackle any project that comes your way.
Spray painting is all about precision, patience, and practice. With the right tools and knowledge, you can transform any surface into a work of art, utilizing a range of colors, textures, and effects. Whether you’re looking to breathe new life into old furniture, create unique decor pieces, or restore antique items, spray painting is an excellent choice for achieving the desired look without breaking the bank.
Essential Techniques for Achieving Rust-Oleum-Approved Spray Painting Results
When it comes to spray painting, achieving that perfect, professional finish can feel daunting. However, with the right techniques and a bit of practice, you can achieve Rust-Oleum-approved results that look fantastic and last long. Follow these essential steps to elevate your spray painting game.
Preparation is Key
Before you even pick up that spray can, proper preparation is crucial. Start by gathering your supplies:
- Rust-Oleum spray paint of your choice
- Sandpaper (120 and 220 grit)
- Clean cloth or tack cloth
- Painter’s tape
- Drop cloth or newspaper
- Protective gear (mask, gloves, goggles)
Next, select the right workspace. Ideally, you want a well-ventilated area to avoid inhaling fumes. Windy conditions can also hinder your results, so choose a calm day if you’re working outdoors.
Surface Preparation
Your desired surface must be clean and smooth for the paint to adhere properly. Here’s how to prepare:
- Clean the Surface: Use soap and water to remove dust, grease, and grime. Allow it to dry completely.
- Sand the Area: Use 120-grit sandpaper to smooth out imperfections. Follow up with 220-grit sandpaper to achieve a fine finish.
- Wipe Down: Use a clean cloth or tack cloth to remove any dust created during sanding.
- Tape Off Edges: Use painter’s tape to protect areas you don’t want to paint.
Technique for Application
Now that you have your surface ready, it’s time to apply the paint. Follow these steps for a flawless application:
- Shake the Can: Before use, shake your Rust-Oleum spray paint can for at least one minute. This helps mix the paint for an even application.
- Test Spray: Before painting your actual surface, do a test spray on a piece of cardboard. This will help you get a feel for the spray pattern.
- Hold the Can at the Right Distance: Aim to keep the can about 10-16 inches away from the surface. This distance helps control the paint flow.
- Use Even Strokes: Spray in a steady, sweeping motion. Move your wrist, not just your arm, and overlap each stroke by about 50% for even coverage.
- Apply Multiple Thin Coats: Rather than loading on a thick coat, apply several light coats. Wait 15-30 minutes between coats for best results.
Drying and Finishing Touches
Allow each coat to dry according to the instructions on the Rust-Oleum label. This typically takes about 30 minutes to an hour, depending on humidity and temperature. Once the final coat has dried, consider applying a clear topcoat for added durability and a glossy finish.
Cleanup and Maintenance
Once you’re done painting, it’s essential to clean up effectively:
- Clean the Nozzle: Turn the can upside down and spray until no paint comes out. This prevents clogging.
- Store Safely: Keep the spray can in a cool, dry place, away from direct sunlight or heat sources.
- Dispose Properly: Follow local regulations for disposing of empty spray paint cans and any leftover materials.
By mastering these essential techniques, you can achieve that coveted Rust-Oleum-approved finish that rivals professional results. Remember to take your time with preparation, application, and cleanup, and enjoy the transformation your spray painting skills can bring.
Common Mistakes to Avoid When Spray Painting
Spray painting can be a fun and effective way to revitalize furniture, create artwork, or apply a fresh coat of paint to outdoor structures. However, mistakes can easily happen if you’re not careful. To achieve professional-quality results without the hassle, it’s essential to steer clear of common pitfalls. Below is a guide that will help you avoid these mistakes and ensure your spray painting projects turn out beautifully.
Not Preparing the Surface
Your success in spray painting largely depends on how well you prepare the surface. Failing to clean, sand, or prime the area can lead to poor paint adhesion and an uneven finish. Before you begin:
- Clean: Remove dirt, dust, and grease with soap and water or a suitable cleaner.
- Sand: Smooth out rough spots to help the paint stick better.
- Prime: Use a primer if you’re painting over a dark color or a porous surface.
Ignoring the Weather Conditions
Checking the weather is crucial before spray painting outside. High humidity or strong winds can interfere with the paint’s drying time and application. Here’s what to keep in mind:
- Temperature: Aim for a temperature between 50°F to 85°F for optimal painting conditions.
- Humidity: Low humidity ensures quicker drying times and better adherence.
- Wind: A calm day will help control where the paint goes, minimizing overspray.
Overusing the Spray Paint
When you’re eager to cover the surface, it can be tempting to apply too much paint at once. This leads to runs and drips. Instead, follow these tips to get an even coat:
- Thin Layers: Apply multiple light coats instead of one thick layer. This helps avoid drips.
- Distance: Keep the spray can about 6-12 inches away from the surface to ensure even coverage.
- Timing: Allow each layer to dry before applying the next to ensure a solid finish.
Spraying Too Close
Spraying too close to the surface can create a thick coat that doesn’t dry properly. Always remember to maintain an appropriate distance when you spray. A distance of 6 to 12 inches is usually ideal. Adjust your distance based on how the paint is applying. If you see drips or bubbling, back up a bit!
Neglecting to Wear Protective Gear
Your safety should be a top priority when spray painting. Inhaling paint fumes or getting paint on your skin can be harmful. Make sure to wear:
- A Mask: A respirator or mask can prevent you from inhaling harmful aerosols.
- Gloves: Protect your skin from paint and solvents.
- Eye Protection: Safety goggles will shield your eyes from overspray.
Failing to Shake the Can Adequately
Spray cans need to be shaken thoroughly before use to mix the paint evenly. Not shaking the can can lead to uneven color or a coarse texture. The general rule is to shake it for at least one minute after you hear the mixing ball inside. Still, if you’ve been using the can for a while, giving it another shake ensures consistent results.
Not Practicing First
If you’re new to spray painting or using a new type of paint, finding a practice surface is a smart move. Consider using cardboard or a piece of scrap wood to get comfortable with your technique. This practice helps you understand:
- How far to hold the can.
- The right speed for even coverage.
- How the paint reacts on different surfaces.
Skipping Clean-Up and Maintenance
Don’t forget to maintain your tools and clean up properly. Clogged nozzles can ruin your painting experience. Always clean the nozzle and the spray tip after each use to ensure your next project goes smoothly. Keeping your workspace tidy not only enhances safety but also helps you work more efficiently.
By avoiding these common mistakes, you can achieve Rust-Oleum-approved results every time you spray paint. Remember to prepare your surface well, consider weather conditions, and practice your technique. Happy painting!
The Importance of Surface Preparation for Quality Finishes
When it comes to achieving a high-quality finish in painting or refinishing projects, the significance of surface preparation cannot be overstated. Proper preparation ensures that your paint adheres well, providing a smooth and lasting finish that enhances both the appearance and durability of the surface. Whether you’re painting furniture, walls, or outdoor items, the basics of effective surface preparation remain the same. Let’s explore the crucial steps involved in this process.
Why Surface Preparation Matters
Surface preparation is the foundation of any successful paint job. Inadequate preparation can lead to a host of problems, including:
- Painted surfaces that peel or chip
- Poor adhesion to the substrate
- Uneven texture and appearance
- Increased likelihood of rust, corrosion, or damage
The benefits of proper surface preparation extend beyond just looks; they significantly impact the longevity and durability of your paint job. A well-prepared surface creates a solid bond with the paint, reducing the need for frequent repaints and touch-ups.
Assessing Your Surface
Before diving into the preparation process, take a moment to assess the surface you’ll be painting. Is it previously painted, raw wood, metal, or another material? Identifying the surface type will guide you in selecting the right preparation methods and products.
Essential Steps for Effective Surface Preparation
Follow these vital steps to ensure that your painting project starts on the right foot:
1. Clean the Surface
Remove dirt, dust, grease, and other contaminants that can interfere with paint adhesion. Use a suitable cleaner, such as:
- Soap and water for general cleaning
- Degreasers for oily or greasy surfaces
- Trisodium phosphate (TSP) for more stubborn stains
After cleaning, rinse the surface thoroughly and allow it to dry completely.
2. Sand the Surface
Sanding is crucial for smoothing out imperfections and promoting adhesion. Choose the appropriate sandpaper grit based on the surface material:
- Coarse (60-80 grit) for rough surfaces
- Medium (120-150 grit) for smooth surfaces
- Fine (220 grit) for final sanding before painting
Sand in the direction of the grain for wood surfaces to avoid scratching. Remember to remove dust particles with a tack cloth or vacuum after sanding.
3. Repair Any Imperfections
Take the time to fill in any holes, cracks, or dents with an appropriate filler or putty. After applying, let it dry, and sand the area flush with the surrounding surface. This step ensures a smooth base for painting.
4. Prime the Surface
Using a primer tailored to your surface type can enhance adhesion and improve the final finish. Primers work by sealing porous surfaces and creating a uniform base. This is especially important for:
- Raw wood, which can absorb paint unevenly
- Metal, to prevent rust and corrosion
- Previously painted surfaces, which may require special primers
Apply the primer following the manufacturer’s instructions and allow it to dry thoroughly before proceeding.
Final Prep Before Painting
Once the primer is dry, do a final check of the surface. Ensure it’s clean, smooth, and free from any debris or sanding dust. Using painter’s tape can help mask off edges and nearby surfaces, allowing for cleaner lines and eliminating the risk of overspray.
Achieving Quality Finishes
By applying these surface preparation techniques, you set the stage for achieving Rust-Oleum-approved results in your painting projects. Remember that good preparation leads to better application, extends the lifespan of your finish, and results in an eye-catching look that you’ll be proud of.
Whether you’re a weekend DIYer or a seasoned pro, investing the time and effort into surface preparation is what differentiates a mediocre job from a stunning success. Embrace these practices, and you’ll notice a dramatic improvement in your painting outcomes.
Choosing the Right Rust-Oleum Products for Your Project
When it comes to achieving a flawless finish in your painting projects, selecting the right Rust-Oleum products is critical. Whether you’re refurbishing furniture, sprucing up outdoor decor, or tackling DIY home improvements, Rust-Oleum has a range of options tailored to meet diverse needs. Here’s how to navigate your choices effectively.
Understand Your Project Needs
Before diving into product selection, it’s crucial to assess the specific requirements of your project. Start by considering:
- Surface Type: Is your surface wood, metal, plastic, or concrete? Different Rust-Oleum products are formulated for various materials.
- Finish Desired: Do you want a matte, satin, or high-gloss finish? Certain products will yield different looks.
- Interior vs. Exterior: Will your project be indoors or outdoors? Make sure to choose a product that can withstand the environmental conditions.
Choosing the Right Category
Rust-Oleum offers several product categories. Here’s a breakdown of some of the most popular options:
Spray Paints
Rust-Oleum spray paints are great for giving a smooth finish over larger areas or intricate details. They dry quickly and come in various colors and finishes:
- Universal All Surface Spray Paint: Perfect for any surface including metal, wood, plastic, and more.
- Painter’s Touch: Ideal for indoor projects, providing excellent coverage.
- Rust-Oleum Stops Rust: Designed primarily for metal, it provides a protective barrier against rust and corrosion.
Brush-On Paints
If you prefer traditional methods, consider Rust-Oleum brush-on paints:
- Rust-Oleum Protective Enamel: Ideal for metal and wood surfaces. It offers a durable and long-lasting finish.
- Rust-Oleum Chalked Ultra-Matte Paint: This is perfect for achieving that trendy, vintage look.
Primers
Using a primer can significantly improve your paint’s adherence and longevity. Rust-Oleum provides:
- Rust-Oleum Primer: Suitable for metal surfaces and helps in creating a smooth base.
- Rust-Oleum Oil-based Primer: Recommended for better sealing and preventing stains from bleeding through.
Selecting the Right Color
The right color can transform any project, so take your time when choosing. Many Rust-Oleum products come in a vast array of colors. You can check color samples online or in-store. Consider using color swatches to see how they look in your space.
Consider Special Features
Rust-Oleum also offers specialized products that cater to unique project needs:
- High Heat Paint: Perfect for grills or vehicles. It can withstand high temperatures without fading or peeling.
- Anti-Rust Products: Ideal for outdoor items that are exposed to harsh environments.
- Magnetic Paint: Great for creating magnetic surfaces; perfect for kids’ rooms or office spaces.
Read Reviews and Guides
Before making your final choice, it’s wise to read product reviews and guides. Customer experiences can give you insights into how well a specific product works for different projects. Consider visiting home improvement forums or Rust-Oleum’s official website to explore various use cases.
Purchase and Preparation
Once you’ve selected your Rust-Oleum products, it’s time to shop. Make sure to gather all necessary supplies including brushes, drop cloths, and personal protective equipment. Preparation is key to ensuring a successful outcome:
- Cleans the surface thoroughly to remove dust and grease.
- Sand the surface if needed, especially when working with wood.
- Apply a primer if required, allowing it to dry completely before painting.
By taking your time to choose the right Rust-Oleum products for your project, you’ll set yourself up for success, ensuring a beautiful and lasting finish. Happy painting!
Tips for Maintaining Your Spray Painted Surfaces
Spray painting can transform surfaces and give your items a fresh look, but maintaining those spray-painted surfaces ensures they stay vibrant and appealing for years to come. Here are some essential tips to help you keep your spray-painted surfaces in top shape.
1. Clean Regularly
Dust and dirt can build up on your painted surfaces, dulling its finish over time. To avoid this, wipe your items down regularly:
- Use a Soft Cloth: Opt for a microfiber cloth to gently clean the surface, as it won’t scratch or damage the paint.
- Gentle Soap Solution: For tougher grime, mix a few drops of mild dish soap with warm water. Dampen your cloth, wring it out, and wipe the painted area before rinsing with clean water and drying it.
2. Avoid Harsh Chemicals
While it may be tempting to use strong cleaners to maintain your spray-painted surfaces, avoid products that contain bleach or ammonia. These substances can strip the paint or cause discoloration. Stick to gentle cleaning methods to ensure longevity.
3. Protect from Scratches
To keep your surfaces looking fresh, be cautious about how you handle them. Follow these strategies:
- Use Coasters: If you are placing items on painted surfaces, like furniture, always use coasters to prevent scratches.
- Avoid Sharp Objects: Avoid dragging objects across painted surfaces to reduce wear and tear.
4. Store Properly
If you have spray-painted items that are not in use, take the time to store them correctly. Here’s how:
- Keep in a Cool, Dry Place: Temperature and humidity can affect the paint. Store items in a location that is dry and cool to prevent peeling or fading.
- Use Protective Coverings: When possible, use cloth or bubble wrap to protect items from dust and scratches during storage.
5. Touch-Up When Needed
Over time, even the most well-maintained spray-painted surfaces may show signs of wear. Here’s what you can do:
- Inspect Regularly: Check painted surfaces for chips or scratches periodically.
- Quick Touch-Ups: If you notice a spot that needs repair, use the same spray paint to do quick touch-ups. Make sure to clean the area before painting.
6. Reapply a Clear Coat
Adding an extra layer of protection can enhance the durability of your spray-painted surfaces. Consider applying a clear acrylic sealer if:
- Outdoor Exposure: If your item is outside, the sun, rain, and other elements can fade the paint.
- Frequent Use: Items that receive a lot of handling or wear can benefit from additional protection.
7. Be Mindful of Sunlight
Direct sunlight can cause spray paint to fade and lose its luster over time. To protect your surfaces:
- Use UV-Resistant Paint: If possible, opt for spray paint that contains UV protection for outdoor surfaces.
- Move Indoor/Outdoor Items: When not in use, consider storing outdoor painted items in shaded areas or under covers.
8. Moisture Control
Moisture can lead to corrosion, especially on metal surfaces. To avoid this:
- Keep Surfaces Dry: After cleaning, ensure that surfaces dry completely to prevent any water damage.
- Use in Covered Areas: When using spray-painted items outside, try to keep them in a covered area during wet weather.
By following these tips, you can help maintain the beauty and integrity of your spray-painted surfaces. Regular cleaning, proper storage, and protective measures will ensure that your painted items keep looking their best for as long as possible. Whether it’s furniture, craft projects, or outdoor decor, implementing these strategies will keep your spray-painted creations vibrant and appealing for years to come.
Conclusion
Achieving Rust-Oleum-approved spray painting results requires a blend of technique, preparation, and awareness of common pitfalls. By mastering essential techniques, such as holding the can at the appropriate distance and applying even coats, you can ensure a professional finish every time. Avoiding typical mistakes, like skipping surface preparation or applying too much paint at once, will save you from frustration and costly redo projects.
Surface preparation is the foundation of any successful painting job. Cleaning, sanding, and priming your surfaces will enhance adhesion, resulting in a more durable and visually appealing finish. Choosing the right Rust-Oleum products is crucial; each project demands specific paints and finishes that best suit the materials and environments involved. Whether you’re tackling wood, metal, or plastic, selecting the appropriate formula can make all the difference.
Don’t overlook the importance of maintenance for your spray-painted surfaces. Simple routines like cleaning and inspecting can prolong the life of your paint job and maintain its aesthetic appeal. By following these guidelines and implementing the strategies discussed, you can transform your projects and achieve results that not only look fantastic but also stand the test of time.
With a solid understanding of these critical aspects, you’re now equipped to take on your next spray painting project with confidence. Rust-Oleum’s wide range of products and tips are your allies on this creative journey, ensuring you can achieve the best results possible. Happy painting!