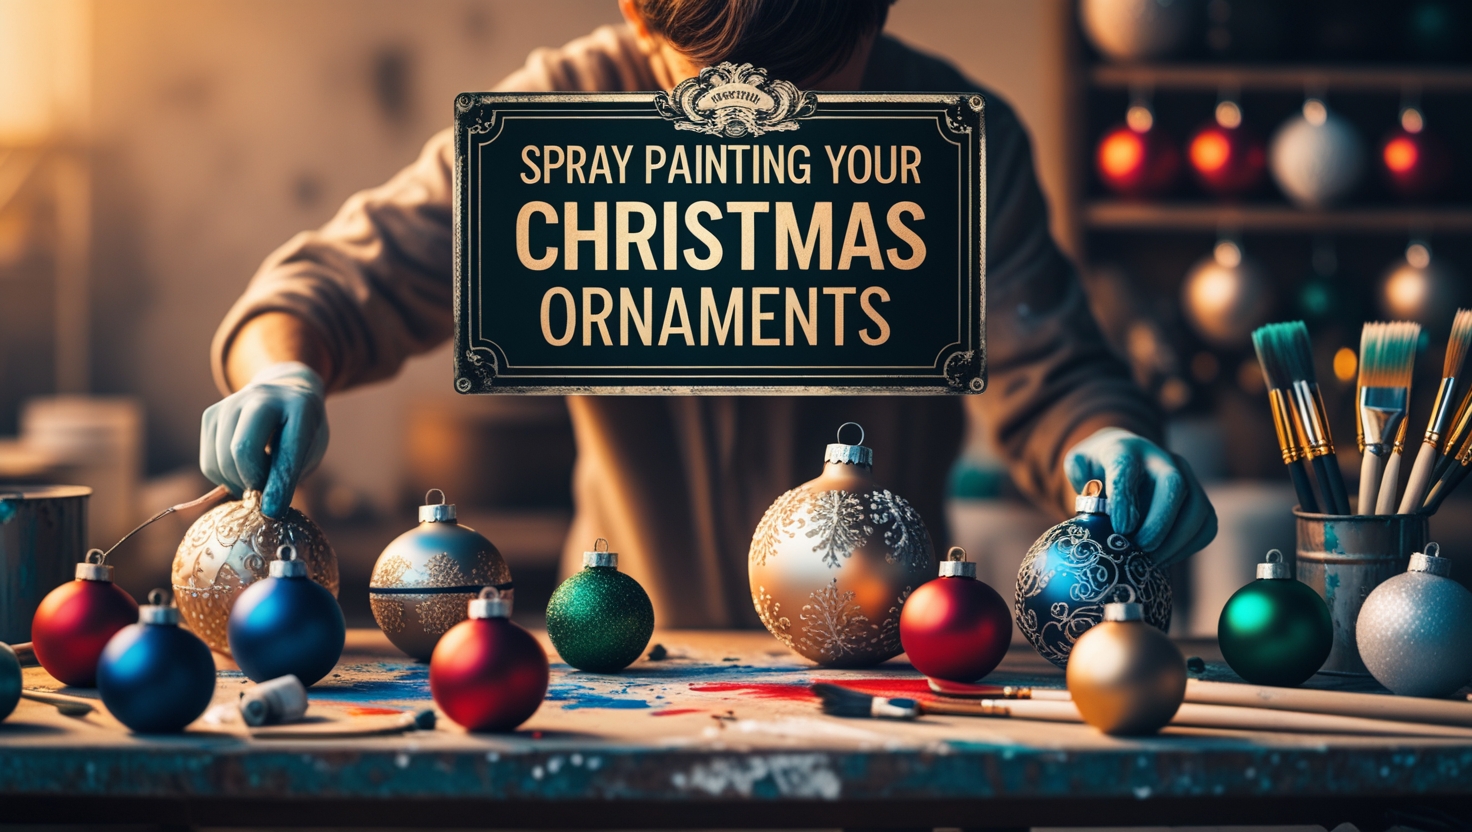
As the holiday season approaches, many of us look forward to decorating our homes with festive cheer. One of the most delightful ways to add some sparkle to your decorations is by painting your Christmas ornaments. With just a few simple supplies and some basic techniques, you can create unique and personalized decorations that will make your holiday season truly memorable. This guide will take you through the step-by-step process of spray painting your Christmas ornaments to add a personal touch to your holiday decor.
Why Spray Painting Ornaments?
Spray painting is an excellent way to customize your Christmas ornaments, allowing you to reflect your personality and style. By using a variety of colors and techniques, you can create stunning designs that enhance your holiday decor. Plus, this activity is fun and engaging, making it a great project for the whole family to enjoy together. With the right supplies and a bit of creativity, you can create beautiful and unique holiday decorations that will be cherished for years to come.
Deck the Halls: A Comprehensive Guide to Spray Painting Your Christmas Ornaments
Are you ready to add personalized charm to your Christmas tree this year? One of the best ways to do that is by spray painting your Christmas ornaments. It’s a fun, creative activity that allows you to express your holiday spirit while crafting unique decorations. Follow this step-by-step guide to ensure a festive and successful spray painting experience!
Gather Your Supplies
Before you start, it’s essential to gather all necessary materials. Here’s what you’ll need:
- Glass or plastic Christmas ornaments (choose your favorite shapes)
- Primer spray paint (optional for better adhesion)
- Colored spray paint (in your desired holiday colors)
- Clear coat spray (for a glossy finish)
- Drop cloth or old newspapers (to protect your workspace)
- Masking tape (optional for adding designs)
- Protective gloves and a face mask (for safety)
Prepare Your Workspace
Finding the right spot to spray paint your ornaments is crucial. Choose a well-ventilated outdoor area or a spacious garage. Lay down your drop cloth or newspapers to catch any overspray. This step is vital for an easy cleanup and to protect surfaces from drips and stains.
Prep Your Ornaments
If you’re using glass ornaments, gently clean them with rubbing alcohol to remove any dust or fingerprints. If your ornaments are plastic, a simple wipe-down will do. If you want to use primer, apply a thin layer to enhance the paint’s adherence. Let them dry completely before proceeding.
Start Spray Painting
Now comes the fun part! Here’s how to go about it:
- Shake the spray paint: Before you spray, shake the can well according to the manufacturer’s instructions.
- Spray at a distance: Hold the spray paint can about 6-12 inches away from the ornament to ensure even coverage.
- Apply thin layers: Start with light sprays to avoid drips. It’s better to do several light coats than one heavy coat.
- Rotate the ornament: As you spray, slowly rotate the ornament to cover all sides.
- Let it dry: After the first coat, allow the paint to dry completely (usually about 20-30 minutes) before applying additional coats. This will help achieve a vibrant finish.
Add Creative Designs
If you want some personal flair, consider using masking tape to create patterns like stripes or chevrons. Simply tape off sections of the ornament before spraying your desired color. You can also use stencils for intricate designs or add glitter after the paint dries for some shimmer.
Seal Your Work
Once you are satisfied with the paint, it’s time to seal your ornaments. Applying a clear coat will protect your artwork from scratches and help it last through the holiday season. Hold the clear coat spray about 6-12 inches away and apply a gentle layer. Allow it to dry thoroughly according to the manufacturer’s instructions.
Determine Your Display Method
Now that your ornaments are beautifully painted and sealed, consider how you’ll showcase them:
- Hang them on a tree with coordinating ribbons.
- Display them in decorative glass bowls as centerpieces.
- String them along garlands for a festive touch.
Cleanup and Safety
Don’t forget to clean up your workspace! Dispose of any masking tape and newspapers responsibly. Make sure to wash your hands thoroughly after handling spray paint and wear gloves to keep your hands clean during the process. Keep your face mask on until everything is cleaned up to avoid inhaling fumes.
Spray painting your Christmas ornaments is a joyful and creative way to deck the halls this holiday season. With a little preparation and imagination, you can make your tree uniquely yours. Happy crafting, and cherish the holiday spirit this year! Enjoy making precious memories with your amazing, custom-made ornaments!
Choosing the Right Spray Paint for Holiday Crafts
The holiday season is the perfect time to unleash your creativity and add a personal touch to your decor. Among various crafts, spray painting holiday ornaments is a fun and easy way to transform ordinary pieces into beautiful festive decor. Choosing the right spray paint for your holiday crafts can make all the difference between a project that shines and one that falls flat. Here’s a guide to help you select the best spray paint for your needs.
Understanding Your Project
Before you dive into the world of spray paints, take a moment to consider what type of project you’re working on. Different projects might require different kinds of spray paint. Here’s a checklist to help you identify your needs:
- Material of the Ornament: Are you painting glass, wood, plastic, or metal? Different materials require different types of spray paint.
- Finish: Do you prefer a matte, glossy, or metallic finish?
- Indoor or Outdoor Use: Will your painted ornaments be displayed indoors, or exposed to the elements outside?
- Coverage Needed: Do you need a paint that covers well in one coat, or are you fine with multiple layers?
Types of Spray Paint
Here’s a look at some of the popular types of spray paint that can help you deck your halls with style:
Acrylic Spray Paint
Acrylic spray paint is an excellent choice for holiday crafts. It’s water-based, making it easy to clean up, and suitable for indoor projects. It dries quickly and provides a nice, even finish. Plus, the colors tend to be vibrant, perfect for seasonal cheer!
Enamel Spray Paint
If you want something durable, enamel spray paint is a good option. It provides excellent coverage and is available in various finishes, including glossy and matte. It’s particularly great for outdoor decorations, as it stands up well to the elements.
Metallic Spray Paint
For those looking to add a touch of glam to their holiday crafts, consider metallic spray paint. This paint gives a shiny, polished look and works beautifully on ornaments. It’s ideal for accents but may require a primer depending on the surface you’re painting.
Choosing the Right Finish
The finish of your spray paint plays a significant role in the overall appearance of your crafts. Here are the common finish options:
- Glossy: Reflective and bright, a glossy finish can make your decorations pop. It’s perfect for adding a cheerful touch to your ornaments.
- Matte: If you prefer a subtle, elegant look, matte finish is excellent. It absorbs light rather than reflecting it, providing a softer appearance.
- Metallic: As mentioned earlier, metallic finishes are striking and can give crafts a upscale look, making them stand out during the holiday season.
Safety Considerations
Whatever type of spray paint you decide on, safety should always be a priority. Here are some tips to keep in mind:
- Ventilation: Always spray paint in a well-ventilated area to avoid inhaling fumes.
- Protective Gear: Wear a mask and gloves to protect your skin and lungs from paint particles.
- Test the Paint: Before starting on your final project, test the paint on a small piece of the same material.
Where to Buy Spray Paint
When it’s time to shop for your spray paint, consider checking out:
- Local Craft Stores: These often have a wide selection of colors and finishes tailored for holiday crafts.
- Online Retailers: If you’re looking for specific brands or hard-to-find colors, online shopping can offer an extensive selection.
- Home Improvement Stores: They usually carry the more durable spray paint options suitable for outdoor decorations.
With your spray paint selected, you’re ready to begin creating beautiful, customized holiday ornaments. The right spray paint can elevate your crafting experience, allowing your festive decorations to shine beautifully throughout the season. So grab your supplies, get inspired, and let your creativity flow! Happy crafting!
Creative Ideas for Decorating Your Christmas Tree with Custom Ornaments
The festive season is one of the most magical times of the year, and decorating your Christmas tree is a cherished tradition for many families. One way to elevate your tree’s look is by incorporating custom ornaments that reflect your personality and style. Here are some creative ideas to inspire you as you craft a beautiful and unique holiday display.
1. Personal Touch with Family Photo Ornaments
Using family photos to create custom ornaments is a wonderful way to make your tree feel special. You can:
- Print photos on cardstock, cut them into shapes, and laminate them for durability.
- Use clear glass or plastic ornaments, filling them with small photo prints or paper copies of family memories.
- Make a rotating display by attaching clips to ornaments, allowing you to switch photos each year.
2. Customized Ornaments with Children’s Artwork
Turn your child’s beautiful drawings into keepsake ornaments. Here’s how:
- Scan or photograph the artwork, then print it onto transfer paper and iron it onto fabric ornaments.
- Create ornaments from clay or other materials, using your child’s artwork as inspiration for shapes and colors.
- Laminate small pieces of art and add a ribbon for hanging.
3. Themed Ornaments for a Cohesive Look
If you enjoy a specific theme, consider using custom ornaments to enhance it. Popular themes include:
- Nature-Inspired: Use twigs, leaves, or even small pinecones, painted or decorated to match your theme.
- Color Palette: Choose a color scheme for your ornaments, such as metallics for a glam look or pastels for a soft, whimsical feel.
- Destination Ornaments: Craft ornaments that showcase places you’ve traveled to, using small souvenirs or pictures.
4. Create Elegant DIY Ornaments
For those who love crafts, creating elegant DIY ornaments can be a rewarding experience. Consider:
- Felt Ornaments: Cut shapes from felt and sew or glue them together. You can embellish them with beads, sequins, or embroidery for extra flair.
- Painted Ornaments: Use acrylic paint to design glass or wooden ornaments. Hand-painted designs can be festive or minimalist, depending on your style.
- Scented Ornaments: Combine dried oranges, cinnamon sticks, and other fragrant materials in clear ornaments for a delightful holiday scent.
5. Incorporate Meaning with Memory Ornaments
Make your tree a narrative of your family’s journey by incorporating memory ornaments. You can:
- Source ornaments that represent important milestones – think graduation caps, wedding rings, or baby shoes.
- Create a timeline by hanging ornaments that commemorate each year’s highlight for your family.
- Write a brief note or story about each ornament and hang it near the corresponding decoration for a heartwarming touch.
6. Light Up with Illuminated Ornaments
Adding a glow to your tree can create an enchanting atmosphere. Here are ways to achieve that:
- Use battery-operated fairy lights inside clear ornaments to give them a warm, glowing effect.
- Find illuminated ornaments that change colors, enhancing the visual interest of your tree.
- Create your own by using small LED lights with transparent ornaments filled with festive decorations.
7. Sustainable Ornaments for Eco-Friendly Decor
Being environmentally conscious doesn’t mean sacrificing creativity. Consider these sustainable options:
- Use repurposed materials such as old jewelry, buttons, or fabrics to create new ornaments.
- Craft ornaments from natural elements like wood slices, corks, or dried fruits.
- Encourage your community to exchange ornaments for a fun and eco-friendly tradition.
Custom ornaments into your Christmas tree can transform your holiday experience. Whether you choose sentimental pieces, DIY crafts, or themed decorations, the options are limitless. Embrace your creativity this season and let your tree reflect you and your family’s unique journey.
Essential Safety Tips for Spray Painting Indoors and Outdoors
Spray painting can be a fun and creative way to add a fresh touch to your home décor, crafts, or even furniture. However, whether you choose to spray paint indoors or outdoors, prioritizing safety is essential. Understanding the proper precautions can protect you and your surroundings. Here’s a step-by-step guide to ensuring a safe spray painting experience.
Conduct Pre-Painting Preparations
Before you even pick up a spray can, take the time to prepare your workspace. This applies equally to both indoor and outdoor settings.
- Select a well-ventilated area: For indoor projects, keep windows open and use fans to promote airflow. Outdoor areas are ideal for minimizing fumes.
- Cover surfaces: Use drop cloths or plastic sheets to protect surfaces from overspray.
- Gather necessary materials: Have your spray paint, brushes, gloves, mask, and goggles ready. Making sure you have everything at hand reduces the risk of accidents.
Wear Appropriate Safety Gear
Selecting the right personal protective equipment (PPE) is critical when spray painting. Here’s what you should wear:
- Respirator or mask: Fumes can be harmful, especially in enclosed spaces. Use a mask designed for paint spray to guard against inhaling harmful particles.
- Safety goggles: Protect your eyes from spray mist and dust. This is particularly important if you’re using a powerful sprayer that can send paint flying.
- Gloves: Choose disposable gloves to keep your hands safe from paint and solvents.
- Long sleeves: Wear clothing that covers your arms to prevent skin contact with paint.
Handling Spray Paint Properly
Knowing how to handle spray paint can make your job easier and safer.
- Shake the can: Shake the spray paint can thoroughly before use to ensure it mixes well. This helps in getting an even spray.
- Test spray: Always test the spray on scrap paper or cardboard first to get a feel for the spray pattern and prevent mistakes on your main project.
- Keep a safe distance: Hold the spray can about 8 to 12 inches away from the surface to avoid paint drips and ensure an even application.
- Use smooth motions: Spray in a steady, sweeping motion to prevent thick spots of paint that can become messy.
Environmental Considerations
When spray painting outdoors, be mindful of the weather and surroundings:
- Avoid windy days: Wind can carry spray fumes and particles, creating a less controlled environment and potentially affecting nearby property.
- Check the temperature: Extreme temperatures can affect the spray paint’s performance. Ideal conditions are typically between 50°F and 90°F.
- Stay away from flammable materials: Ensure that there are no open flames, including grills and fire pits, nearby while spray painting.
Post-Painting Cleanup
Once you’ve finished spraying, the cleanup process is equally important for safety:
- Dispose of materials properly: Follow local regulations for disposing of empty spray cans and any unused paint.
- Clean your tools: If you used brushes or rollers, clean them thoroughly to extend their lifespan.
- Ventilate: Allow the painted area to air out until it is safe to occupy, particularly if you’ve worked indoors.
- Wash your hands: After removing gloves, wash your hands thoroughly to remove any paint residue.
By following these essential safety tips for spray painting indoors and outdoors, you can create a more enjoyable, safer environment for your artistic pursuits. Remember, preparation and awareness of your surroundings are key components to a successful spray painting experience. So roll up your sleeves, stay safe, and enjoy the creativity that spray painting can bring to your life!
Transforming Old Ornaments: Upcycling Ideas for a Festive Touch
The holiday season is all about joy, creativity, and spreading cheer. One way to capture this festive spirit is by transforming your old ornaments into delightful new treasures. Upcycling ornaments not only adds a personal touch to your décor but also helps reduce waste and encourages sustainability. Here’s a guide to some fun and easy ideas for giving your ornaments a fresh twist.
Repaint for a New Look
If your ornaments look dull or outdated, a fresh coat of paint can work wonders. Here’s how to do it:
- Choose Your Colors: Pick colors that complement your holiday theme. Metallics like gold or silver can add elegance, while vibrant hues can bring playfulness.
- Prep the Surface: Clean the ornaments thoroughly. If they have a glossy finish, lightly sand the surface to help the paint adhere better.
- Spray Painting: Use spray paint for an even coat. Hold the can about 6-12 inches away and spray in light, even strokes. Allow to dry completely.
- Add Designs: Use paint pens or markers to add details, patterns, or even holiday messages!
Decorative Decoupage
Decoupage is a simple and fun way to give old ornaments a brand-new appearance. This technique can incorporate festive images, patterns, or even your family’s photos. Here’s how:
- Gather Your Supplies: You will need Mod Podge, scissors, a paintbrush, and decorative paper (like wrapping paper, scrapbook paper, or photos).
- Cut and Adhere: Cut your paper into desired shapes and sizes. Apply a layer of Mod Podge on the ornament, place the cutouts, and then add another layer of Mod Podge on top to seal the design.
- Let Dry: Allow it to dry completely before hanging.
Repurpose into Other Decor
Why not take your ornament upcycling a step further? Here are some clever ways to repurpose old ornaments:
- Ornament Wreath: Take a wire frame and attach assorted ornaments using hot glue or ties to create a festive wreath for your door.
- Gift Tags: Turn flat ornaments into unique gift tags. Just write a festive message on the back!
- Table Centerpiece: Fill a glass bowl or vase with colorful ornaments for a beautiful table centerpiece.
Make a Holiday Garland
Creating a garland with your old ornaments can add a charming flair to your holiday décor.
- Select Your Ornaments: Choose a mix of shapes and sizes.
- Gather Materials: You’ll need twine or ribbon, a needle, and scissors.
- String Them Together: Use the needle to thread the twine through the ornaments, spacing them evenly. Hang your garland along your mantel, staircase, or wall to display your creativity!
Add Personal Touches
Make your ornaments truly one-of-a-kind. Here are a few personal touches you can add:
- Names & Dates: Write the names of family members or the year on ornaments to celebrate special moments.
- Photos: Attach small photos of family memories from past holidays for a sentimental touch.
- Child Art: Let your kids decorate ornaments with their artwork. This is a great way to engage them in holiday crafting!
By choosing to transform your old ornaments, you are not only decorating your home for the holidays but also engaging in a rewarding and sustainable practice. Whether you decide to repaint, decoupage, or repurpose, each idea provides a chance to unleash your creativity and share some festive joy. So gather your supplies and start crafting today—your holiday décor awaits a cheerful transformation!
Conclusion
As you prepare to deck the halls this holiday season, spray painting your Christmas ornaments can be a wonderful way to express your creativity and add a personal touch to your festive décor. With the right spray paint in hand, you can create vibrant, eye-catching ornaments that perfectly match your Christmas tree theme. Remember to consider the finish and color that will best complement your decorations.
Don’t hesitate to explore the imaginative ideas for decorating your tree with custom-painted ornaments. Mixing and matching different styles can enhance the visual appeal of your tree, making it a unique centerpiece for your holiday celebrations. Plus, by upcycling old ornaments, you breathe new life into items that might otherwise gather dust, adding charm and character to your holiday display.
Safety should always be a priority when spray painting, whether you’re indoors or outdoors. Following essential safety tips will ensure a smooth and enjoyable crafting experience. Proper ventilation, wearing masks, and using protective gear will keep you safe while you unleash your imagination.
As you embark on this festive project, remember that the process of creating and customizing your ornaments is just as joyful as the final result. So grab your spray paint and get started! With these ideas and tips in hand, you’re ready to make this holiday season truly special with personalized, beautiful decorations that reflect your style and spirit. Happy crafting, and may your holidays be filled with creativity and cheer!