
Are outdated tiles diminishing the style of your home or office? If you’re looking to give those old, worn tiles a fresh new look without spending a fortune, spray painting is a powerful DIY solution. With the right approach and materials, spray painting for tile makeovers can dramatically elevate the look of your space, leaving it modern, clean, and customized to your aesthetic preferences. In this detailed guide, we’ll walk you through each step of the spray painting process for tiles, covering essential techniques, tools, and tips to help you achieve a professional-quality transformation.
Tile makeovers have become a popular choice for budget-friendly home updates, and spray painting offers an affordable, eco-friendly, and surprisingly simple way to do it. Whether you’re targeting bathroom tiles, kitchen backsplashes, or any tiled area in need of a refresh, spray painting can make a big impact in a short amount of time. Let’s dive in and explore how to achieve stunning tile results with spray paint.
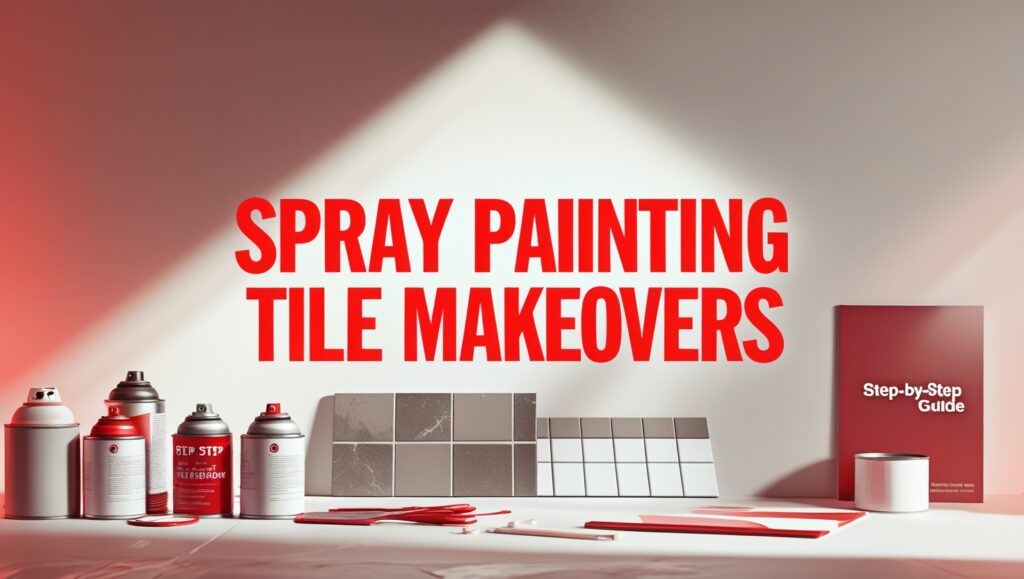
Transform Your Space: The Essential Steps for Spray Painting Tile
If you’re looking to refresh your space without breaking the bank, spray painting tiles can be a fantastic solution. Whether it’s your kitchen, bathroom, or any other tiled area in your home, a little color can go a long way. This guide walks you through the essential steps for spray painting tile, giving your surfaces a fresh, new look.
Why Spray Paint Tile?
Spray painting tile is not just about aesthetics; it can also protect and extend the life of your tiles. If your tiles are chipped, discolored, or simply out of style, paint can mask imperfections and create a uniform appearance. Plus, it’s an affordable DIY project that can typically be done over a weekend.
Gather Your Supplies
Before you dive in, it’s essential to gather everything you need. Here’s a handy checklist:
- Tile cleaner or degreaser
- Sandpaper (around 220-grit)
- Masking tape and plastic sheeting
- Primer (spray-on, suitable for tile)
- Spray paint (choose a color that suits your decor)
- Clear sealant (optional but recommended)
- Paint mask and gloves
Prepare the Area
Before you start painting, preparation is key. First, ensure your workspace is well-ventilated. Open windows and doors to let fresh air circulate. Lay down drop cloths to catch any overspray and protect your floors. Remove any items from the tiled surface and cover any areas you don’t want to paint using masking tape and plastic sheeting.
Clean Your Tiles
Cleaning the tiles thoroughly is critical for ensuring good adhesion of your new paint. Use a tile cleaner or degreaser to scrub away any grime, grease, or soap residue. Rinse well and allow the surface to dry completely before moving on to the next step.
Sand the Surface
Lightly sand the tiles with your sandpaper. This step creates a rough surface for the primer and paint to grip. Be sure to remove any dust created by sanding with a damp cloth after you finish.
Apply the Primer
Using your spray primer, apply a uniform layer over the tiles. Hold the spray can about 8 to 10 inches away from the surface and make smooth, sweeping motions. Allow the primer to dry completely according to the manufacturer’s instructions. This is essential for long-lasting results.
Spray Paint the Tiles
Now for the fun part—applying the spray paint! Choose a high-quality spray paint specifically designed for tile or ceramics for best results. Here’s how to do it:
- Shake the spray can well before use.
- Apply the paint in thin layers to avoid drips.
- Allow each layer to dry completely before adding another coat. Typically, two to three coats will give you full coverage.
Protect with Sealant
Once the final coat of paint is dry, consider applying a clear sealant. This not only enhances durability but also makes cleaning easier. Follow the sealant’s instructions for application, and make sure everything is fully cured before re-introducing items onto the tiles.
Maintenance Tips
After transforming your space with freshly painted tiles, proper maintenance will help keep them looking great. Here are a few tips:
- Avoid abrasive cleaners that can damage the paint.
- Use mild soap and water for regular cleaning.
- Reapply sealant as needed, according to wear and tear.
With patience and careful execution, you’ll achieve beautiful results that can revitalize your space. Spray painting tiles can be a rewarding project that transforms not just the look but also the feel of your home. So, grab those supplies and enjoy the process of making your space uniquely yours!
Choosing the Right Spray Paint for Tile Projects
When embarking on a tile makeover, one key element stands out: choosing the right spray paint. The correct type ensures not only a beautiful finish but also durability and ease of application. Here’s how to select the best spray paint for your tile projects so that your transformation is smooth and long-lasting.
Understand Your Tile Material
Different tiles require different types of spray paint. It’s essential to know if your tiles are ceramic, porcelain, or textured. Here’s a quick breakdown:
- Ceramic Tiles: Often smooth, these tiles work best with spray paint designed for ceramics or those labeled for use on non-porous surfaces.
- Porcelain Tiles: Since they are dense and smooth, you’ll want a high-quality spray paint that adheres well to non-porous surfaces.
- Textured Tiles: For these, opt for paint that can reach into the crevices and adhere effectively, helping to minimize any wear and tear.
Consider the Finish
Selecting a finish can dramatically impact the aesthetics of your project. Here are the common finishes you’ll encounter:
- Glossy: High-shine paints reflect light beautifully and are ideal for modern spaces.
- Satin: This finish offers a soft sheen and is easier to clean, making it fantastic for kitchens and bathrooms.
- Matte: A non-reflective surface creates a sophisticated look but can be more challenging to clean.
Durability and Resistance
When dealing with tiles, especially in high-traffic areas, durability is crucial. Here’s what to look for:
- Water Resistance: Tiles in bathrooms or kitchens need paint that can withstand moisture.
- Scratch Resistance: High-quality spray paint should be able to endure wear, especially if you’re painting floor tiles.
- UV Resistance: If your tiles are outdoors or exposed to sunlight, pick paint that won’t fade over time.
Easy Application
The application process can make or break your project. Choose a spray paint that offers:
- Multiple Nozzle Options: A paint can with adjustable nozzles allows for better control, especially in tight spaces.
- Fast Drying: Quick-drying paints minimize waiting time and help in layering coats efficiently.
- Ease of Use: Lightweight spray cans with good ergonomics reduce strain while painting and offer a smooth spray action.
Brand Reputation and Recommendations
Not all spray paints are created equal. It pays to do a bit of research. Consider opting for brands known for their durability and finish quality on tiles. Recommendations from fellow DIYers or professionals can point you in the right direction. Checking customer reviews online can provide additional insights into the effectiveness of specific products.
Test Before Committing
Before you fully commit to a color and brand, consider testing a small section. This can help you see how the color looks once dried and how well the spray paint adheres to your specific tile surface. Testing allows you to adjust your choices based on your unique project.
Safety Considerations
Prioritize safety. When spray painting, especially indoors, ensure you have:
- Good Ventilation: Open windows or use fans to circulate fresh air while you paint.
- Protective Gear: Wear gloves, a mask, and goggles to shield against excess spray and fumes.
- Drop Cloths and Tape: Cover areas not meant to be painted to safeguard against accidental overspray.
Choosing the right spray paint for your tile projects is a multifaceted process, but with these guidelines, you can confidently select a paint that will transform your space beautifully. From knowing your tile material to ensuring a durable finish, making the right choice will enhance the longevity and appearance of your tiles.
Preparing Your Tile for a Flawless Finish: Tips and Techniques
Transforming your tile surfaces can breathe new life into your home. Whether you are updating your bathroom, kitchen, or any other area, proper preparation is key to achieving a flawless finish. Here are some essential tips and techniques that will ensure your tile surfaces are ready for a stunning makeover.
Gather Your Tools and Materials
Before diving into the project, make sure you have everything you need. Here’s a helpful checklist of tools and materials:
- Tile cleaner or degreaser
- Scrub brush or sponge
- Sandpaper or a sander
- Masking tape
- Drop cloths or plastic sheets
- Spray paint or tile paint
- Sealant (optional)
- Protective gear (gloves, mask, goggles)
Cleaning the Tile
The first step in preparing your tile is to clean it thoroughly. This process is crucial, as it removes dirt, grease, and other residues that might interfere with adhesion.
To clean your tile:
- Choose a high-quality tile cleaner or degreaser.
- Apply the cleaner to the tiles and let it sit for a few minutes.
- Use a scrub brush or sponge to scrub away any grime.
- Rinse the tiles with clean water and let them dry completely.
Sanding for Better Adhesion
Once your tiles are clean, it’s time to make the surface more adhesive-friendly. Sanding helps create a rough texture that allows the paint to adhere better.
Here’s how to proceed:
- Use medium to fine grit sandpaper.
- Lightly sand the tile surface in a circular motion.
- Focus on areas that are glossy or smooth.
- After sanding, wipe away the dust with a damp cloth.
Masking Areas
With your tiles clean and sanded, it’s important to protect surrounding areas from paint splatter. This step will help you achieve a clean, professional-looking finish without any mess.
Follow these masking steps:
- Use masking tape to outline the edges of the tiles.
- Cover adjacent surfaces with drop cloths or plastic sheets.
- Ensure the tape sticks well and creates a sharp line to avoid paint bleed.
Applying the Paint
Now that your tiles are prepped and masked, it’s time for the fun part: painting! Choose a high-quality spray paint specifically formulated for tiles.
Here’s how to do it right:
- Shake the spray paint can for about a minute to mix well.
- Hold the spray can about 10–12 inches away from the surface.
- Start with light coats instead of heavy ones. Apply two to three light coats for an even finish.
- Allow each coat to dry as per the manufacturer’s instructions before applying the next one.
Sealing the Finish
Once your paint has dried completely, consider applying a sealant. This will help protect your newly painted tiles from chips, scratches, and moisture. Not only does it enhance durability, but it also improves the overall appearance.
Follow these sealing tips:
- Choose a compatible sealant for your paint type.
- Apply the sealant evenly with a brush, sponge, or spray.
- Let it dry completely before using the tiled area.
Proper Maintenance
To keep your newly painted tiles looking fresh, regular maintenance is essential. Here are few maintenance tips:
- Avoid harsh chemicals that can damage the paint.
- Clean surfaces gently with a soft cloth or sponge.
- Routine inspections for chips or scratches can help in early repairs.
By following these tips and techniques, you can prepare your tiles for a beautiful makeover. With the right preparation, you’ll achieve a flawless finish that you can be proud of for years to come.
Common Mistakes to Avoid When Spray Painting Tiles
Spray painting tiles can breathe new life into your home, but it’s crucial to avoid common pitfalls to achieve a stunning finish. Whether you’re updating a bathroom or revitalizing a kitchen, knowing what not to do will save you time and ensure your project looks professional. Here are some key mistakes to steer clear of when spray painting tiles.
Skipping Surface Preparation
One of the biggest mistakes you can make is neglecting the preparation of the tile surface. Properly prepping your tiles is essential for a smooth and lasting finish. Clean the tiles thoroughly to remove any grime or grease that could interfere with adhesion. Use a mix of warm water and a mild detergent. For tough stains, consider using a tile cleaner or a light abrasive pad. After cleaning, rinse the tiles well and allow them to dry completely.
Using the Wrong Type of Paint
Choosing the right paint is critical for spray painting tiles. Regular paint won’t adhere well and can chip easily. Look for paints specifically designed for tiles or porcelain. These formulations often include a primer and offer durability suited for high-moisture areas.
Ignoring the Importance of Primer
A common mistake is skipping primer entirely. Applying a primer designed for tile will create a better bond between the paint and tile surface, enhancing longevity. Consider using a spray-on primer that matches the paint type. This step will help prevent peeling and ensure an even color application.
Neglecting Ventilation
If you’re working indoors, proper ventilation is essential. Fumes from spray paint can be harmful, and a lack of airflow can lead to an unpleasant working environment. Always use a fan and open windows to increase air circulation. A mask designed for paint fumes is also a good precaution to keep yourself safe while working.
Applying Too Thick a Coat
It’s easy to apply too much paint, especially for novice spray painters. Thick layers can run, causing drips and uneven patches. Instead, aim to apply multiple thin coats. This will not only help achieve a smoother finish but also allow each layer to dry properly before the next application.
Not Allowing Sufficient Drying Time
Patience is key when it comes to drying times. Failing to allow enough time for each coat to dry can lead to smudging or an uneven finish. Follow the manufacturer’s guidelines for drying times between coats and before the final curing. For added assurance, leave the tiles untouched for 24 hours after the final coat.
Forgetting About Sealing
After painting your tiles, a sealer is vital for protecting your new finish. Many DIYers skip this step, thinking it’s unnecessary. A good sealant will shield your paint from moisture and wear, especially in areas like kitchens and bathrooms. Opt for a clear, tile-safe sealer that’s compatible with your paint choice.
Choosing the Wrong Tools
Using the incorrect spray nozzle can lead to uneven application and wasted paint. Ensure you choose a nozzle that allows for control and precision, especially when maneuvering around edges and corners. Additionally, using a high-quality paint sprayer will provide a professional-like finish.
Rushing the Process
Completing a tile spray painting project can be exciting, but rushing can ruin your hard work. Take your time during every step—from cleaning to painting and sealing. A rushed job might seem faster but can lead to mistakes that require additional work to fix later. Follow a slow and steady approach to ensure each stage is done correctly.
Not Testing the Paint First
Always test your paint on a small section of tile before starting your project. This will help you assess the color and texture, as well as confirm adhesion. It’s an essential step that can save you from a mismatched color scheme or unexpected results.
Taking the time to avoid these common mistakes will help ensure your spray painting project is a success. With careful preparation and a mindful approach, you can transform your tiles and elevate your space with confidence.
Inspiring Tile Makeovers: Before and After Transformations
The beauty of tile makeovers lies in their ability to completely transform a space. With a little creativity and effort, you can turn dull, outdated tiles into stunning focal points that breathe new life into your home. Below are several inspiring before and after transformations that will ignite your imagination and encourage you to embark on your own tile renovation journey.
Classic Bathroom Refresh
Imagine stepping into a bathroom that feels more like a luxurious spa rather than a standard washroom. In a recent makeover, the original beige tiles were replaced with large-format black tiles that instantly modernized the space. Complimented with sleek white fixtures and chic gold accents, this transformation turned an ordinary bathroom into a stylish retreat.
Key Changes:
- Replaced old tiles with large-format black tiles.
- Added a fresh coat of paint in soothing shades.
- Incorporated modern fixtures and gold hardware for a luxe feel.
- Used clever lighting to enhance ambiance.
Kitchen Upgrade
Have you ever felt that your kitchen is more of a chore than a joy? A simple tile makeover can work wonders! In one stunning upgrade, dated white tiles featuring fruit designs were swapped for chic, glossy subway tiles in soft gray. This modification provided deeper, more sophisticated color tones and made the kitchen feel bigger and brighter. The added grouting details in contrasting shades created a stunning visual interest to the room.
Why It Worked:
- Updated tiles created a fresh, contemporary look.
- Light colors expanded the sense of space.
- Glossy finishes reflect light, brightening the area.
- Subway tiles add texture and style without overwhelming the space.
Outdoor Areas Reimagined
Outdoor spaces often get overlooked, but they too can shine with a creative tile makeover. Consider a patio that once felt drab and uninspiring. By replacing plain concrete tiles with colorful patterned ceramic tiles, this outdoor area now pops with personality. This airy space serves as both a gathering place for family and friends, and an oasis for relaxation.
Transformed Elements:
- Swapped out dull concrete tiles for ceramic beauties.
- Added comfortable seating arrangements that complement the new tiles.
- Incorporated potted plants for a touch of nature.
- Increased lighting for evening enjoyment.
Elegant Entryways
When guests enter your home, the entryway is the first impression. One transformation that stands out involved an outdated entry featuring cracked, dull tiles. Replacing them with stunning mosaic tiles created an inviting and stylish greeting space. The mix of colors in the mosaic adds original flair, while a new runner rug ties the whole look together.
Highlights of the Makeover:
- New mosaic tiles offered a dramatic entrance.
- Decorative elements like a stylish mirror and vase added charm.
- Area rugs provided warmth and comfort.
- Updated lighting to enhance aesthetics.
Cost-Effective Solutions
Many homeowners worry that such makeovers can be expensive. However, there are many budget-friendly options available. You don’t necessarily need to tear out and replace tiles completely. Consider painting tiles with specialized tile paint or using stickers specifically designed for tiles. These alternatives can provide a brand-new look without the hefty price tag.
- Tile Paint: A budget-friendly way to refresh existing tiles.
- Tile Stickers: Easy-to-apply options for a temporary change.
- Guided DIY Projects: Plenty of online tutorials can help you.
- Restoration Services: Professional help can save time and effort.
Inspiring tile makeovers are achievable for every homeowner. With just some imagination and the right materials, you can create captivating spaces that reflect your personal style. From kitchens to bathrooms and outdoor areas, don’t hesitate to explore how a simple change in tile can elevate your space from mundane to extraordinary. Whether you take the DIY route or consult professionals, your dream renovation is just a step away!
Conclusion
Transforming your space through spray painting tiles can be a rewarding project that breathes new life into any room. By following the essential steps for spray painting tile, you can achieve a stunning new look that rivals costly renovations. Remember, selecting the right spray paint is critical. Look for options specifically designed for tile to ensure durability and a smooth finish.
Preparation is key. Taking the time to clean, sand, and prime your tiles sets the stage for a flawless application. Utilizing effective techniques will not only enhance the aesthetic outcome but also extend the longevity of your makeover. Avoiding common mistakes, such as rushing the prep work or neglecting safety precautions, will help you achieve the best results possible.
As you embark on this creative journey, take inspiration from before and after transformations that showcase the incredible potential of spray-painted tiles. Whether you’re revitalizing a bathroom or adding a splash of color to a kitchen backsplash, each project offers a unique opportunity for personal expression.
By keeping these tips in mind—selecting the right materials, properly prepping your surface, and learning from others’ experiences—you can successfully transform your space with spray-painted tiles. Enjoy the process and watch as your home evolves into a reflection of your style and creativity. The satisfaction of completing your tile makeover will motivate you to tackle even more projects, unlocking the full potential of your living environment. Happy painting!