Are you ready to elevate your artistic skills and transform everyday items into extraordinary works of art? Spray painting intricate designs is an exciting way to express your creativity and personalize your space. With the right techniques and tools, you can master the art of spray painting and create stunning designs that will impress your friends and family. In this comprehensive guide, we’ll walk you through everything you need to know about spray painting intricate designs using stencils.
Why Choose Spray Painting for Intricate Designs?
Spray painting offers a versatile and efficient method for applying color and detail to various surfaces. Unlike traditional painting methods, spray painting allows for smooth application and intricate detailing, making it ideal for creating stunning designs. Whether you’re working on walls, furniture, or smaller crafts, spray painting can deliver a professional-looking finish that’s hard to achieve with a brush.
Are you ready to elevate your artistic skills and transform everyday items into extraordinary works of art? Spray painting intricate designs is an exciting way to express your creativity and personalize your space. With the right techniques and tools, you can master the art of spray painting and create stunning designs that will impress your friends and family. In this comprehensive guide, we’ll walk you through everything you need to know about spray painting intricate designs using stencils
Get Creative with Stencils: Exploring Innovative Spray Painting Techniques
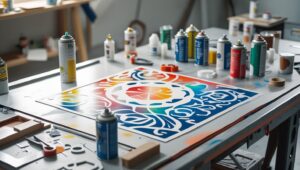
Getting creative with stencils can take your spray painting projects to the next level. Whether you’re looking to decorate a wall, upcycle furniture, or create eye-catching art pieces, stencils allow for intricate designs that are both fun and easy to make. High-quality spray paints and innovative techniques can produce stunning results that impress anyone who sees them. Now, let’s explore some of the most exciting spray painting techniques using stencils.
Choosing Your Stencil Design
The first step in your creative journey is selecting a stencil design. You can use pre-made stencils available online or in craft stores. Alternatively, create your own using stencil sheets. Here are some popular design ideas:
- Geometric Patterns: Perfect for modern decor.
- Nature-Inspired Shapes: Leaves, flowers, and animals add a vibrant natural touch.
- Text and Quotes: Motivational sayings can personalize spaces.
- Abstract Designs: Get experimental with swirls and splashes.
Gather Your Materials
Before you begin, gather the necessary materials:
- Stencils
- Spray paint (choose colors that complement your project)
- Masking tape
- Drop cloths or newspapers
- Protective gloves and a mask
Having everything in place will streamline your process and help prevent any mess.
Prepare Your Surface
The next important step involves preparing your surface. Make sure it’s clean, dry, and free from dirt. If you’re painting furniture or walls, consider sanding any rough areas for a smoother finish. Use drop cloths or newspapers to protect the surrounding area from overspray. This preparation makes a notable difference in ensuring your design turns out polished and professional.
Secure the Stencil
Once your surface is prepped, it’s time to secure your stencil. Use masking tape to hold the stencil in position. Ensure it’s flat against the surface to prevent paint from bleeding under the edges. For larger stencils, you might need a second set of hands for extra assistance, but this step is crucial for ensuring crisp lines.
Spray Painting Techniques
When you’re ready to spray paint, adopt some of these innovative techniques for the best results:
- Light Layers: Start with a light coat of paint. This helps to avoid drips and ensures even coverage. Let each layer dry before applying the next one.
- Gradient Effect: To achieve a gradient effect, spray multiple colors while the previous layer is still slightly wet. This mix of colors can create an appealing ombre effect.
- Texture Techniques: For unique textures, use sponges or brushes to dab paint over the stencil. This technique creates a layered look and adds depth to your design.
- Multi-Colored Designs: Plan your design ahead and use different colors by simply lifting and repositioning the stencil or using multiple stencils.
- Shadowing: To create a shadow effect, use a slightly darker shade along one side of the stencil after the main design has dried.
Removing the Stencil
After you’ve achieved the look you want, carefully remove the stencil while the paint is still slightly wet. This helps to avoid peeling away any dried paint with it. Gently lift the edges and pull it away smoothly to reveal the design underneath. If you’re using multiple stencils, allow drying time between steps to prevent smudging.
Finishing Touches
Once your design is complete and fully dry, consider sealing it for durability. A clear sealer can protect your artwork from fading or chipping. This step is particularly important for outdoor projects or surfaces that will face regular usage.
Experimenting with stencils can lead to amazing results that showcase your artistic side. So grab your sprays and stencils, and get creative with your next project!
Choosing the Right Stencil Material for Your Project
When embarking on a creative project that involves stencils, selecting the right material is crucial. The material you choose for your stencils can significantly impact your results and ease of use. Whether you’re new to stencil art or a seasoned pro, understanding the various materials available ensures your project turns out exactly as you envisioned. Let’s explore the top stencil materials and how each one can serve your specific needs.
Vinyl Stencils
Vinyl is one of the most popular choices for stencil-making. It’s easy to cut and has a great adhesive quality that keeps the stencil in place during application. Here are a few benefits of using vinyl stencils:
- Durable: Vinyl stencils can withstand multiple uses without tearing.
- Clean Edges: The material cuts nicely, producing crisp lines for intricate designs.
- Removable: Once finished, vinyl stencils peel off easily without leaving residue.
Mylar Stencils
Mylar is another excellent option, especially for those who want longevity in their stencils. This plastic material holds up well to various types of paint and can be cleaned and reused multiple times. Here are some advantages:
- Flexible: Mylar can bend slightly, allowing it to conform to curved surfaces.
- Waterproof: It’s resistant to paints and other substances, making cleanup easier.
- Variety of Thicknesses: You can choose thicker or thinner options depending on your project requirements.
Paper Stencils
If you’re looking for a budget-friendly option, consider paper stencils. While they aren’t as durable as vinyl or Mylar, they can still be quite effective for short-term projects. Here’s what you should know about paper stencils:
- Inexpensive: Great for one-off projects or practice runs.
- Easy to Find: You can easily create your own from cardstock or purchase pre-made ones.
- Easy to Cut: Paper is easy to cut, enabling you to create detailed designs quickly.
Wooden Stencils
For a more robust solution, wooden stencils create a striking effect. They are perfect for larger projects and give a unique touch to your artwork. Consider these points:
- Sturdy: Wood stencils can withstand significant wear and are less likely to bend or tear.
- Visual Interest: The textured surface adds depth to your designs, making them visually unique.
- Reusable: After thorough cleaning, wooden stencils can be used multiple times, potentially lasting a lifetime.
Choosing the Right Material for Your Design
When choosing the right stencil material, consider the following factors:
- Project Duration: Are you doing a one-time project or something you’ll use repeatedly?
- Surface Type: Will you apply your stencil to flat or curved surfaces?
- Complexity of Design: How detailed is your stencil? Some materials are better suited for intricate designs than others.
- Type of Paint: Different materials can react differently to paints, so factor in the type you’ll be using.
After weighing these considerations, you can make an educated decision on the best stencil material for your needs. Just remember that each option has its own pros and cons. Learning from your experiences will help you fine-tune your choices for future projects.
Ultimately, the right stencil material can elevate your project significantly, giving you the desired look while also simplifying the application process. So, take your time in selecting the stencil material that aligns with your artistic vision, and let your creativity shine!
Now it’s your turn to experiment! Choose a stencil material that fits your project and start creating beautiful designs. Whether you’re enhancing home decor or making artistic gifts, the right stencil materials can make all the difference in your artistic journey.
Essential Tools and Supplies for Spray Painting with Stencils
When you’re ready to transform your space with stencils and spray paint, having the right toolkit is essential. Whether you’re a beginner or a seasoned pro, these tools and supplies will help bring your intricate designs to life. Follow this checklist to ensure you’re well-equipped for your next creative project.
1. Stencils
Your main focus will be on the stencils themselves. You can choose from a vast range of pre-made designs or craft your own using materials that can withstand spray paint. Consider the following:
- Material: Choose durable, reusable materials like Mylar or thicker cardstock.
- Design Variety: Look for both intricate and simple designs that complement your vision.
- Size: Ensure the stencils are the right size for your project, whether it’s a wall, canvas, or another surface.
2. Spray Paint
Not all spray paints are created equal. The paint you select can make a significant difference in the final look of your project. Keep these tips in mind:
- Finish: Opt for finishes that suit your style, from matte to glossy.
- Type: Choose paints formulated for different surfaces—wood, metal, or fabric.
- Color Selection: Have a few colors on hand to create depth and contrast in your designs.
3. Primer
A primer is crucial for achieving an even finish and ensuring that paint adheres properly. Use it on uneven surfaces or bare wood to create a smooth canvas for your artwork.
4. Masking Tape
This simple tool can save you a lot of heartache. Use masking tape to hold your stencils in place, so they don’t shift while you spray.
5. Protective Gear
Your safety is paramount when working with spray paint. Ensure you have the following protective gear:
- Mask: A respirator or mask can protect you from inhaling harmful fumes.
- Gloves: Disposable gloves will keep your hands clean and protected from paint.
- Goggles: Safety goggles prevent paint from getting into your eyes.
6. Drop Cloths
Protect your workspace (and nearby surfaces) by laying down drop cloths. This ensures your environment remains clean and helps contain any overspray.
7. Brush or Foam Applicator
Sometimes, you may want to apply a touch of paint directly within detailed areas of your stencil. A fine brush or foam applicator can help fill in those spots precisely.
8. Leveling Equipment
To ensure your stencils are applied straight, consider using leveling tools. A laser level or traditional level can help you achieve perfect alignment on your projects. This is especially vital for larger designs.
9. A Good Workspace
Choosing the right area to work is just as important as the tools you use. Ensure your workspace has good ventilation and is well-lit. If possible, work outdoors to minimize fumes and mess.
10. Clean-Up Supplies
After the fun of painting is over, having clean-up supplies will help you wrap up your project smoothly. Be sure to have:
- Solvant or Paint Thinner: For cleaning tools and any accidental spills.
- Rags or Paper Towels: Useful for immediate clean-up and for any smudges that may occur while working.
- Trash Bags: For easy disposal of used materials and any overflow debris.
With these essential tools and supplies, you’re poised to create stunning spray-painted designs using stencils. Remember, practice makes perfect. Start with simpler designs, and as you gain confidence, work your way up to more intricate patterns. Happy crafting!
Step-by-Step Process for Achieving Intricate Designs with Stencils
If you’re looking for a fun and creative way to enhance your living space or personal items, using stencils with spray paint can be an amazing option. It’s an easy process that lets you add intricate designs to almost any surface. Whether you’re a beginner or have some experience, following a step-by-step process can help you achieve stunning results. Let’s dive into how you can get started with spray painting intricate stencil designs.
Gather Your Materials
To begin crafting your stencil masterpiece, you’ll need a few essential supplies:
- Stencil material (mylar, cardboard, or plastic sheets)
- Spray paint (choose the colors suitable for your project)
- Painter’s tape
- Craft knife or scissors
- Protective gloves and mask
- Drop cloth or newspapers (to protect your work area)
- Stencil brush (optional, depending on your technique)
Choose Your Design
The first step is to select a design that excites you. You can find stencils online or create your own. Think about what will best suit the area you want to decorate. Consider designs that align with your personal style—floral patterns, geometric shapes, or even quotes can transform your space beautifully.
Create Your Stencil
Once you’ve decided on a design, it’s time to make your stencil. Here’s how:
- Print or draw your design: If you’re creating from scratch, draw your design to scale on paper.
- Transfer the design: Place your design on the stencil material. Use a craft knife or scissors to cut out the shapes, creating the stencil. Remember that the pieces you remove will define the painted areas.
Prepare Your Workspace
Before you start painting, set up a spacious area to work. Lay down your drop cloth or newspapers to protect surfaces from overspray. Always work in a well-ventilated area, preferably outdoors, to ensure your safety while using spray paint. Don your protective gloves and mask, as the fumes can be harmful.
Secure the Stencil
Next, place the stencil on the surface you wish to paint. Secure it using painter’s tape to ensure it doesn’t shift while you spray. Make sure the stencil lies flat against the surface for precise designs. You can also use adhesive spray to hold it in place securely.
Apply the Spray Paint
When you’re ready to paint, follow these tips:
- Shake the can: Give your spray paint can a good shake to mix the pigments well.
- Test spray: Aim the nozzle at a scrap piece of material and press the spray to test the flow of paint.
- Keep a consistent distance: Hold the spray can approximately 6 to 12 inches away from the stencil. This distance helps create an even coat.
- Multi-layering: Apply a light layer first. You can always add more layers if needed. Remember to paint in thin coats to prevent drips.
Remove the Stencil
After you finish spraying, allow the paint to dry for a few moments. Carefully peel back the stencil while the paint is still tacky to avoid smudging. Take your time to ensure a clean removal for the best outcome.
Final Touches
Once the paint is dry, inspect your design for any touch-ups. If you notice any irregularities or areas needing correction, you can use a fine brush and extra paint for minor fixes. Make sure the design is exactly what you envisioned!
Enjoy Your Creation
Now, step back and admire your work. Whether you revamped a piece of furniture, a wall, or an accessory, enjoy the unique designs you’ve created with your stencils. Remember, practice makes perfect. Don’t hesitate to experiment with different colors and designs to fully embrace the art of spray painting with stencils!
By following these steps, you can successfully create intricate designs using stencils, adding a personal touch to any space. Happy crafting!
Tips for Maintaining and Reusing Your Stencils for Future Projects
Stencils are a fantastic way to add flair and creativity to your projects. Painting intricate designs can be fun and rewarding, but what happens after you’re done? Maintaining and reusing your stencils not only saves you money but also allows you to keep creating without starting from scratch each time. Here are some practical tips to help you maintain your stencils and get the most out of them.
Clean Your Stencils Properly
One of the most important steps in maintaining your stencils is to clean them right after use. Depending on the type of paint used, the cleaning method may vary:
- Acrylic Paint: Rinse your stencil in warm water immediately after use. Use a soft brush for stubborn spots.
- Spray Paint: Use a solvent like mineral spirits on a rag to wipe your stencil clean, avoiding soaking it in liquid.
- Fabric Paint: Hand wash with mild soap and water, then air dry to prevent warping.
Make sure to dry your stencils flat to avoid bending or warping. Proper cleaning ensures the design stays crisp for future projects.
Store Stencils Safely
Storage is just as vital in maintaining your stencils. If you toss them in a drawer haphazardly, they can get damaged. Here are some effective storage strategies:
- Use a Stencil Folder: Purchase a dedicated folder or use a large binder with plastic sheets to keep them flat and organized.
- Label Your Stencils: If you have many designs, it helps to label them for easy access.
- Avoid Direct Sunlight: Store your stencils in a cool, dry area to prevent discoloration and brittleness.
Inspect for Damage
Regularly checking your stencils for wear and tear is crucial. Look for the following:
- Cracks: Even small cracks can affect how well the stencil performs.
- Bends and Warps: Damaged stencils won’t lay flat on the surface, leading to poor paint application.
- Repetitive Use: Designs that are frequently used may show signs of wear; consider making copies before they get too worn.
Repair Techniques for Stencils
Don’t fret if your stencil gets damaged! You can use some straightforward techniques to extend its life:
- Use Clear Tape: If there are small cracks, applying clear tape on the backside can help reinforce the structure.
- Transfer Sheets: If sections are fully ruined, trace the remaining design onto a new sheet to recreate it.
- Stencil Material: For more durability, you may also want to invest in thicker materials, like mylar. These don’t tear easily and can withstand repeated use.
Consider DIY Stencils
If your original stencils are beyond repair, consider creating your own. With the right materials, you can use any design you like:
- Materials Needed: A cutting machine, craft knife, and sturdy material such as cardstock or plastic sheets. You can also use a printable template for a more straightforward approach.
- Design Flexibility: Making your own stencils allows for customized designs tailored to your specific projects.
- Cost-Effective: DIY stencils prove to be a cost-effective solution while allowing you to express your individuality in designs.
Remember to Test Before Use
Before diving into painting a project with your stencil, always conduct a test run on a scrap piece of material. This step helps you to:
- Ensure the paint adheres correctly without bleeding through the stencil.
- Adjust your technique if necessary to achieve your desired look.
- Save time and materials by making adjustments beforehand.
By effectively maintaining and reusing your stencils, you can maximize their life and maintain creativity in your art projects. Each stencil holds potential for amazing designs, so treat them with care and keep the creativity flowing!
Conclusion
Embracing the art of stencil spray painting opens up a world of creativity and expression. By exploring innovative techniques, you can transform ordinary surfaces into stunning masterpieces. Selecting the right stencil material is crucial, as it impacts both the quality of your designs and the ease of the painting process. Whether you opt for plastic, paper, or adhesive stencils, understanding their unique properties will help you achieve the best results.
Equipping yourself with essential tools and supplies is another vital step in ensuring your project runs smoothly. From high-quality spray paints to the right masks and protective gear, having everything ready beforehand can save time and hassle.
The step-by-step process for achieving intricate designs with stencils is straightforward and enjoyable. By following each phase carefully—preparing your workspace, positioning your stencil, and applying your spray paint with precision—you can create eye-catching patterns worth displaying.
Moreover, with a little care and attention, your stencils can last for numerous projects. Maintaining and reusing them not only saves money but also inspires you to experiment with different designs and techniques.
Now that you have insight into all these elements, it’s time to unleash your creativity. Grab your stencils and spray paint, and start crafting unique designs that reflect your personal style. Remember, the only limit to your creations is your imagination, so don’t hesitate to dive in and make something extraordinary!