As we all know, plastic chairs can look dull and uninviting, but that’s where a little creativity and a can of spray paint can work wonders. With the right paint, you can transform your old, lackluster chairs into a colorful and vibrant masterpiece that adds a pop of personality to any room. In this article, we’ll delve into the world of spray paints for plastic chairs, discussing the best brands, colors, and techniques to help you achieve a professional-looking finish.
Spray paints for plastic chairs have gained immense popularity in recent years due to their ease of use, versatility, and durability. Whether you’re a DIY enthusiast, a homeowner, or a small business owner, spray paints are an excellent way to give your chairs a much-needed makeover. In this article, we’ll explore the top-rated spray paints for plastic chairs, covering factors such as application, durability, and color options. Let’s get started!

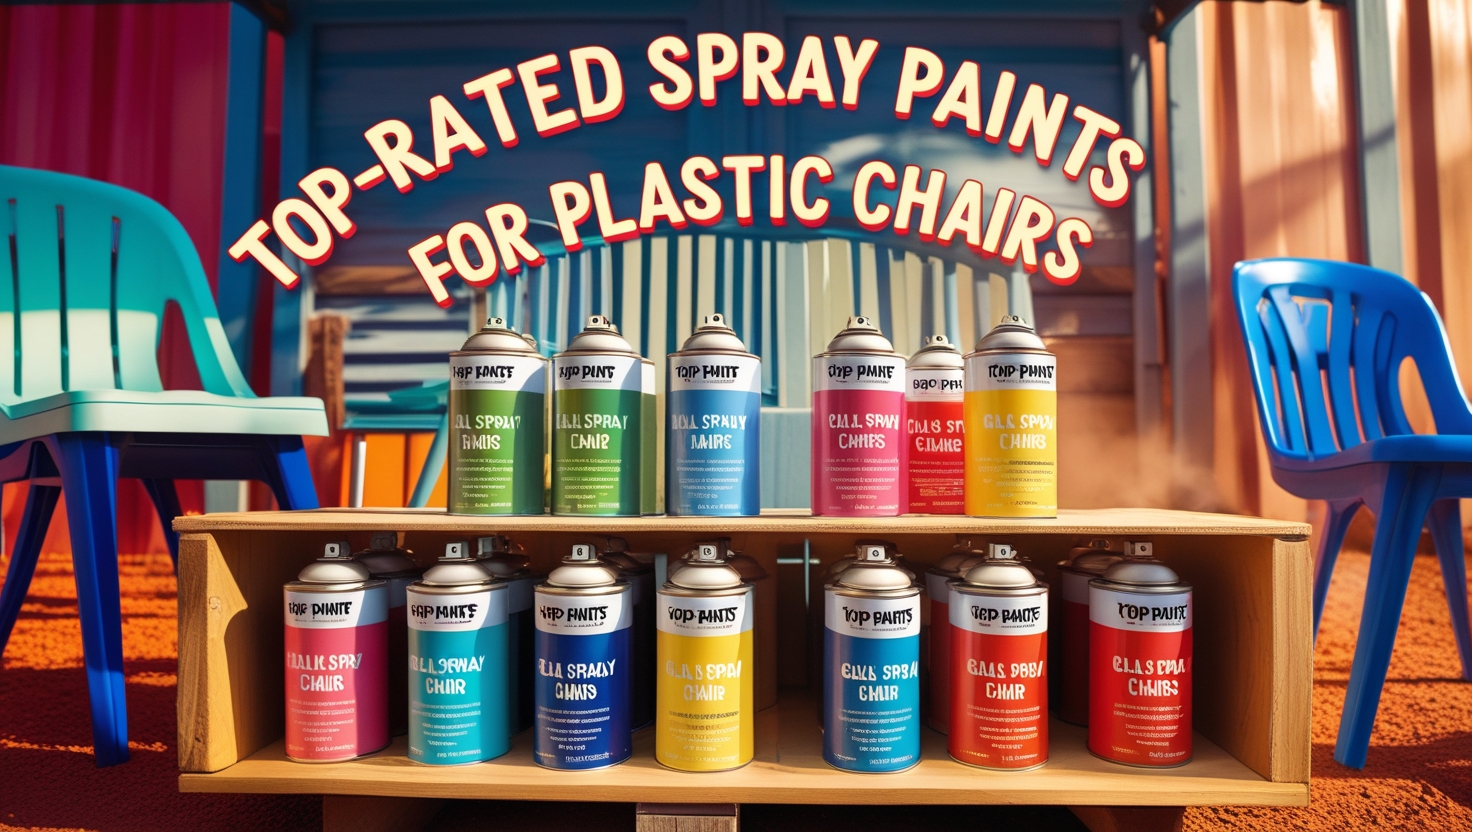
Creative Ways to Spruce Up Your Seat: Best Spray Paints for Plastic Chairs
Are you tired of your dull plastic chairs? Want to give them a fresh, vibrant look without breaking the bank? Painting your plastic chairs is a fun and easy DIY project that can breathe new life into your outdoor or indoor seating. With the right spray paints tailored for plastic surfaces, you can turn those old, worn-out chairs into stylish focal points. Here are some top-rated spray paints that can help you spruce up your seat!
Why Choose Spray Paint for Plastic Chairs?
Spray paint is an excellent choice for plastic chairs due to its ease of use and quick-drying capabilities. Unlike traditional paint, spray paint provides a smooth finish and allows you to cover uneven surfaces effortlessly. Plus, it comes in a wide variety of colors and finishes, enabling you to unleash your creativity and customize your chairs to match your decor.
Top-Rated Spray Paints for Plastic Chairs
- Rust-Oleum Specialty Plastic PrimerThis primer is a must for ensuring that your spray paint adheres properly to plastic surfaces. It helps create a strong base, enhancing durability and longevity. Apply it before using colored spray paint for the best results.
- Krylon Fusion All-In-One Spray PaintThis versatile spray paint is specially formulated for plastic. It eliminates the need for a primer, making the application process more straightforward. Its fast-drying formula means you can finish and enjoy your chairs in no time!
- Rust-Oleum 2X Ultra Cover Spray PaintPerfect for outdoor furniture, this spray paint offers exceptional coverage and a smooth finish. It resists chipping, fading, and peeling, ensuring your colorful chairs remain vibrant for years. Choose from a variety of trendy colors to match your style.
- Krylon Indoor-Outdoor Spray PaintIf you’re looking for an option that can be used both indoors and outdoors, this is an excellent choice. It dries quickly and features a fade-resistant formula, making it perfect for plastic chairs that will see plenty of sunlight.
- Dupli-Color Vinyl and Fabric CoatingThis unique spray is ideal for plastic chairs that are particularly smooth or glossy, ensuring a strong bond that won’t crack or peel. Available in various colors, it also adds a protective layer from UV rays and wear and tear.
Steps to Spruce Up Your Chairs
Ready to start your DIY project? Here’s a simple guide to help you transform those plastic chairs:
- Choose Your Colors: Decide on the colors you want to use. You might want to go for a bold new color or keep it classic with white or black.
- Gather Your Materials: You’ll need spray paint, primer (if not using a self-priming paint), painter’s tape, plastic drop cloths, and gloves.
- Preparation: Clean your chairs thoroughly to remove dirt, grease, and residue. Sanding them lightly can help the paint adhere better.
- Prime If Necessary: If you’re using a paint that requires a primer, spray it evenly over the chairs and let it dry completely.
- Start Painting: Shake the spray paint canister well before applying. Hold the can about 10-12 inches away from the chair and spray in a sweeping motion for an even coat. Let the first coat dry before applying additional coats.
- Finishing Touches: Once you’re satisfied with the coverage, allow the chairs to cure for at least 24 hours before using them. This will ensure the paint is fully set.
Additional Tips for Best Results
To achieve the best finish and durability, consider these helpful tips:
- Work in a well-ventilated area to avoid inhaling fumes.
- Use painter’s tape to mask off areas you don’t want to paint.
- For a textured finish, experiment with different spray techniques, such as light directional sprays.
- Make sure to layer your paint. Two to three coats will improve the richness of the color and add durability.
By choosing the right spray paints and following these simple steps, you can easily and affordably spruce up your plastic chairs. Dive into your project and enjoy the satisfaction of creating beautiful, customized seating for your home or outdoor space!
Essential Tips for Preparing Plastic Chairs Before Painting
Are you eager to transform your dull plastic chairs into vibrant pieces that brighten up your space? Before you grab that can of spray paint, it’s crucial to prepare your chairs properly. This step is vital for ensuring that the paint adheres well and lasts long. Here’s a detailed guide to help you get your plastic chairs ready before painting.
Gather Your Supplies
First things first, collect all the materials you will need. Here’s a simple list:
- Soap and water
- Rags or cloths
- Sandpaper or a sanding sponge
- Masking tape
- Plastic primer (optional but recommended)
- Spray paint designed for plastic
- Drop cloths or newspapers
Clean the Chairs Thoroughly
One of the most important steps in preparing your plastic chairs is cleaning them. Dirt, grease, and dust prevent paint from sticking properly. Here’s how to do it:
- Mix up some soapy water: Use a mild detergent with warm water.
- Wipe the chairs down: Use rags to scrub all surfaces thoroughly. Pay special attention to any crevices.
- Rinse well: Remove any soap residue with clean water.
- Let them dry: Allow the chairs to air dry completely before moving to the next step.
Sand the Surface
Next, it’s time to create a better surface for the paint to cling to. Sanding is a fantastic way to achieve this:
- Use fine-grit sandpaper: Gently sand the areas you plan to paint. You do not need to remove all the existing finish, just rough up the surface a bit.
- Wipe away dust: After sanding, ensure you wipe the chairs down again to remove any dust created by the sanding process.
Mask Off Areas You Don’t Want to Paint
To achieve a professional-looking finish, it’s important to be neat with your painting. Here’s how to mask off areas:
- Use masking tape: Apply tape to any parts of the chair that you don’t want to paint, such as the legs or logos.
- Cover large areas: Use drop cloths or newspapers to protect your workspace from overspray.
Consider Using a Primer
Using a primer can ensure that your paint adheres better and lasts longer. While you can skip this step, it’s recommended, especially for plastic surfaces:
- Select a plastic primer: Look for a primer specifically designed for plastics.
- Apply evenly: Use smooth strokes to apply the primer in thin coats. Let it dry completely before painting.
Choose the Right Spray Paint
The type of spray paint you select is crucial to the outcome of your project. Here are some tips:
- Use paint formulated for plastics: These paints are designed to bond with plastic surfaces effectively.
- Select your color wisely: Consider the overall color scheme of your space when choosing the color of paint.
Final Touches Before Painting
Before you begin spraying, double-check your preparations:
- Ensure the chairs are completely dry.
- Inspect your masking tape and coverings to confirm they are intact.
- Set up your workspace in a well-ventilated area to prevent inhaling fumes.
By following these essential tips for preparing your plastic chairs, you’ll create a solid foundation for a successful paint job. Not only will your chairs look fresh and appealing, but with good preparation, you can enjoy the results for years to come. Happy painting!
Exploring Different Finishes: Matte, Glossy, and Beyond
When it comes to giving your furniture a fresh look, the finish you choose can make all the difference. Different finishes provide varying aesthetic effects and practical benefits. Whether you lean toward a sleek modern look or a more rustic charm, understanding the options available can help you make an informed decision. Let’s dive into various finishes available for your chairs and other furniture, focusing on matte, glossy, and more.
Matte Finish
A matte finish is characterized by its non-reflective surface, which can give a sophisticated and understated appearance to your furniture.
- Pros: Reduces glare, hides imperfections well, and is often easy to clean.
- Cons: Can show fingerprints and smudges more readily than glossy finishes.
Matte finishes are often used for modern indoor furniture, including plastic chairs. They offer a soft touch and muted colors that make them ideal for creating a calm, relaxed atmosphere. Additionally, if you have furniture in high-traffic areas, matte finishes can help mask scratches and other wear over time.
Glossy Finish
Glossy finishes create a high-shine effect, giving your furniture a sleek and polished look. They catch the light beautifully, adding a sense of vibrancy to your space.
- Pros: Easy to clean, resistant to moisture, and reflects light to brighten spaces.
- Cons: Shows dust and fingerprints easily, and any imperfections are more noticeable.
This type of finish is popular for contemporary designs and can create a stunning visual impact. If you are looking to make a statement with your plastic chairs, a glossy finish can do just that. However, keep in mind that you may need to clean your glossy surfaces more often to maintain their shine.
Satin Finish
Satin finishes are the middle ground between matte and glossy. They provide a soft sheen that offers a subtle shine without being overwhelming.
- Pros: Good balance of aesthetics and durability, easy to clean but less showing of imperfections compared to glossy finishes.
- Cons: Might not have as much durability as high-gloss finishes.
Satin finishes are versatile and suit a range of decorative styles. They work well in various environments, offering enough sheen to make your chairs stand out without overwhelming the space. If you’re seeking a finish that you can pair with different color schemes, satin might be your best bet.
Textured Finish
A textured finish adds a tactile element to furniture, creating visual interest by introducing patterns or unevenness to the surface.
- Pros: Can hide scratches and dents, adding character to the furniture.
- Cons: More challenging to clean and might hold onto dust.
Textured finishes work exceptionally well with outdoor plastic chairs, as they can withstand the elements and add a unique flair. They make ordinary furniture stand out and can give your environment a cozy feel. Just be mindful of dust buildup if you opt for this finish.
Choosing the Right Finish for Your Chairs
When selecting the right finish for your plastic chairs, consider your personal style and how the chairs will be used. Here are some tips:
- Assess Your Space: Look at the colors and materials of the surrounding decor. A matte finish may blend well with natural woods, while a glossy finish can accentuate a sleek modern interior.
- Use Case: Think about where the chairs will be used. High-traffic areas might benefit from the durability of glossy or textured finishes.
- Personal Preference: Ultimately, your taste should guide your choice. Choose a finish that makes you happy when you walk into the room.
Exploring different finishes for your plastic chairs can truly transform your living spaces. From elegant matte to striking glossy options, understanding each finish’s attributes helps you personalize your furniture. Choose wisely, and enjoy the refreshed look!
Common Mistakes to Avoid When Painting Plastic Furniture
Painting plastic furniture can breathe new life into your home decor, but getting it right takes a bit of care. If you’re looking to spruce up your plastic chairs, tables, or other furniture pieces, it’s essential to avoid common pitfalls that can hinder your project. This guide will help ensure your DIY painting effort results in a beautiful and long-lasting finish.
Choosing the Wrong Type of Paint
One of the most significant mistakes is selecting the wrong kind of paint. Standard paints often do not adhere well to plastic. Instead, look for paints specifically labeled as suitable for plastic surfaces. These paints are formulated with the necessary binders to stick to slippery plastics securely. Popular options include:
- Spray paint designed for plastic.
- Specialty acrylic paints for plastic.
- Vinyl dye for a flexible finish.
Neglecting Surface Preparation
Before you start painting, preparation is crucial. Many people skip this step, thinking a quick wipe-down is enough. Here’s what you should do:
- Clean the Surface: Use soap and water to remove dirt, grease, and grime. Rinse thoroughly.
- Sanding: Lightly sand the surface with fine-grit sandpaper. This helps create a texture for the paint to grip onto.
- Wipe Down Again: After sanding, wipe the surface with a damp cloth to remove dust.
Skipping Primer
Another common mistake is neglecting to use a primer. Applying a spray primer designed for plastic can make a world of difference. It helps with adhesion and can also enhance the paint’s color. Make sure to choose a primer that matches your paint type. Apply the primer in thin, even layers and let it dry completely before moving on to the paint.
Painting in Poor Conditions
The environment plays a critical role in how your paint adheres and dries. Avoid painting:
- On windy days, which can cause dust and debris to stick to your freshly painted surface.
- In high humidity, as moisture can interfere with the adhesion and finish.
- In direct sunlight, which can cause the paint to dry too quickly and lead to cracking or uneven coverage.
Choose a calm, dry day to ensure optimal conditions for your painting project.
Using Too Thick a Layer of Paint
Many DIY enthusiasts make the mistake of applying too much paint at once. Thick layers can run, drip, and ultimately ruin your finish. Instead, opt for several light coats of paint. This process not only gives a smoother finish but also allows each layer to dry properly before the next is applied. Aim for about two to three thin coats, allowing adequate drying time in between.
Skipping the Top Coat
A common oversight is not applying a protective topcoat. While your painted plastic furniture will look fantastic, it’s essential to safeguard it. A clear top coat adds durability, helping resist scratches and fading from UV rays. Choose a top coat suitable for plastic and apply it after your paint has fully cured, following the manufacturer’s instructions.
Forgetting to Test First
Before you dive into painting your entire piece of furniture, it’s wise to test your paint on a small, inconspicuous area. This small test patch will show you how the color looks and how well it adheres to the plastic. If it’s not what you expected, you can adjust your materials or approach before committing to the whole piece.
Being Impatient
Painting furniture can be an exciting project, but rushing through can lead to mistakes. Ensure you allow each layer of primer and paint to dry fully as per the manufacturer’s recommendations. Impatience can result in peeling, bubbling, or an uneven texture. Planning your time effectively not only enhances your project but also gives you better results.
By avoiding these common mistakes, you can ensure that your efforts in painting plastic furniture yield stunning results. With the right preparation, materials, and patience, your revitalized plastic chairs and tables will enhance your space beautifully.
Reviving Outdoor Décor: How Spray Painting Plastic Chairs Enhances Your Space
Are your outdoor plastic chairs looking a bit dull and weathered? With just a splash of color, you can breathe new life into your space. Spray painting plastic chairs is a fun and easy way to enhance your outdoor décor. Whether you want to create a vibrant oasis or simply touch up those bleached spots, this DIY project can make a remarkable difference. Let’s explore how you can transform your outdoor seating with the right spray paint selection and some handy tips.
When it comes to reviving your outdoor décor, choosing the right spray paint is crucial. Not all paints are created equal, especially when it comes to plastic surfaces. Look for spray paints specifically designed for plastic. These paints adhere better and provide a durable finish that can withstand exposure to sun and rain. Here are some top-rated options:
- Krylon Fusion for Plastic: This paint bonds directly to plastic without needing a primer. It dries quickly and offers a variety of colors, giving you plenty of choices for your design.
- Rust-Oleum Painter’s Touch: Known for its smooth application and durability, this paint is perfect for outdoor use. It’s also available in various finishes, including gloss, satin, and matte.
- Montana Gold Spray Paint: Although often used for street art, it works wonders on plastic surfaces too. It’s great if you’re looking for a more artistic touch and offers a vast array of vibrant colors.
- Plasti Dip: Unlike traditional sprays, this rubber coating gives a unique finish and is removable. This feature is helpful if you enjoy changing your design often.
Now that you’ve selected your spray paint, it’s time for the fun part: the painting process! Here are some simple steps to ensure a successful makeover:
- Gather Your Materials: You will need your spray paint, sandpaper, a drop cloth, painter’s tape, and a well-ventilated area.
- Prep the Chairs: First, give your chairs a good cleaning to remove dirt and grime. If the surface is glossy, lightly sand it to help the paint adhere better. Wipe away any dust with a damp cloth.
- Protect Areas You Don’t Want to Paint: Use painter’s tape to cover any areas around the chairs that you want to protect, such as metal components or where the seats meet the frame.
- Apply the Paint: Shake the can well and spray from about 6-12 inches away. Apply in light coats to avoid drips or runs. Allow each coat to dry before applying another.
- Let it Cure: Once you’re satisfied with the coverage, let the chairs sit for at least 24 hours before using them to ensure the paint cures properly.
This process not only revives the color of your chairs but also protects them from fading and weather damage. A fresh coat of paint can transform a tired-looking garden into a vibrant retreat. Plus, it’s a fantastic way to express your personality and create an outdoor space that feels uniquely yours.
Aside from aesthetics, spray painting plastic chairs can also have practical benefits. The right paint creates a protective layer that can resist chipping and peeling—even under harsh sunlight. This durability ensures that your efforts last longer, meaning less time and money spent on future repairs.
In addition to individual chairs, consider coordinating colors across your outdoor space. You might paint benches or tables in complementary shades to create a cohesive look. This technique can make a small patio feel expansive and inviting.
Don’t hesitate to get creative! If you’re feeling adventurous, try using stencils or tape to create patterns and designs that reflect your style. This custom approach could make your area even more special and personal.
Remember the joy of engaging in a DIY project. It’s not just about enhancing your outdoor décor—it’s about the satisfaction that comes from creating something beautiful. Grab some paint, invite a friend, and enjoy the transformation of your outdoor space!
Conclusion
Transforming your plastic chairs with a fresh coat of paint can breathe new life into your outdoor or indoor spaces, making them vibrant and inviting. From exploring the best spray paints designed specifically for plastic to utilizing creative techniques for a unique finish, you now have the knowledge to embark on this DIY journey confidently.
Preparing your chairs properly is crucial; ensuring that surfaces are clean, dry, and primed sets the foundation for a flawless paint application. Remember to consider the finish that best suits your style—whether you prefer the sleek elegance of glossy paint or the understated charm of matte. Each option offers its unique appeal, aiding in the overall aesthetic of your furnishings.
It’s essential to sidestep common pitfalls during the painting process, such as skipping prep work or applying too heavy a coat. These mistakes can lead to unsatisfactory results, wasting your time and effort.
By reviving your outdoor décor with well-painted plastic chairs, you enhance not only your living space but also your quality of life—inviting friends and family to gather and enjoy your newly decorated area. Remember, your creativity knows no bounds when it comes to customizing your furniture. So grab your preferred spray paint, set aside some time, and let your artistic flair shine as you spruce up your seat!